Showing posts with label On Self Bows. Show all posts

Wednesday, November 16, 2016

From Split Log to Bow Stave, The Last Day.

– my adventures at the two and a half day Bow Making Workshop at Primitive Pursuits in upstate Arnot Forest during prime fall colors…

By Elska á Fjárfella of the Dominion of Myrkfaelinn.

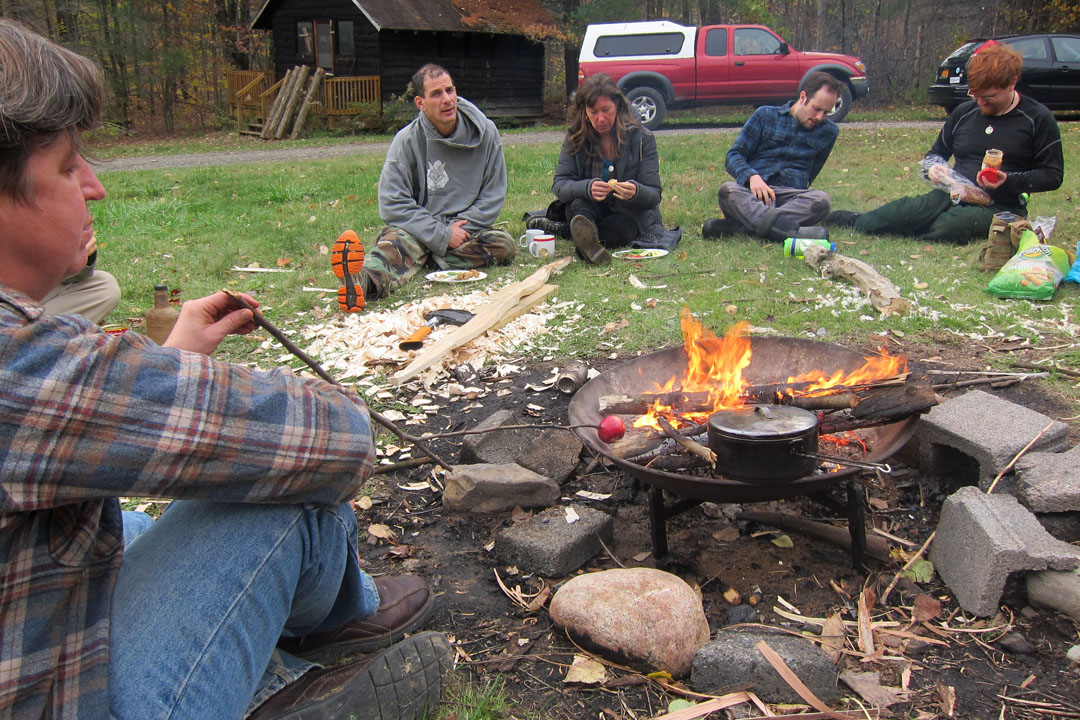
The third day started cloudy and quickly turned into drizzle. Even though we worked outdoors for most of the workshop, we fortunately had the luxury of a roofed pavilion, courtesy of Cornell University’s Arnot Teaching & Research Forest, as getting the bow staves wet or even damp should be avoided (I’d brought mine home to stay the night in the car, instead of all alone under the pavilion.). Moisture can swell the wood and make it harder or inconsistent to work with, as one of the students found out the hard way after she got some raindrops on one of the limbs. For our tillering convenience, the instructors had come up with an ingenious clamp system to secure the bow stave out of some rope and 2×4’s, which I duplicated at home the following week. I don’t think it will be used only for bow making!
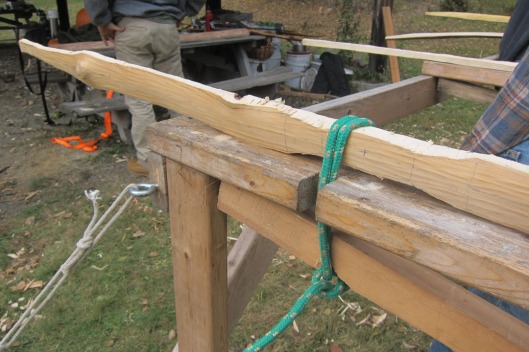
Clamp in use. Basically, it’s made up of a flat piece of 2x4 with a small cut out and two pegs at the other side (behind bow). A rope loop is placed through the cut out (helps wedge the stave tight to the wood pegs) and a piece of 2x2 or 2x3 is pushed through the bottom of the rope loop. With your hand push this lever down and secure the tension with in a piece of scrap wood wedged in between. Do not hammer the scrap wood in; it clamps better if pushed down by hand.
Clamp in use. Basically, it’s made up of a flat piece of 2×4 with a small cut out and two pegs at the other side (behind bow). A rope loop is placed through the cut out (helps wedge the stave tight to the wood pegs) and a piece of 2×2 or 2×3 is pushed through the bottom of the rope loop. With your hand push this lever down and secure the tension with in a piece of scrap wood wedged in between. Do not hammer the scrap wood in; it clamps better if pushed down by hand.

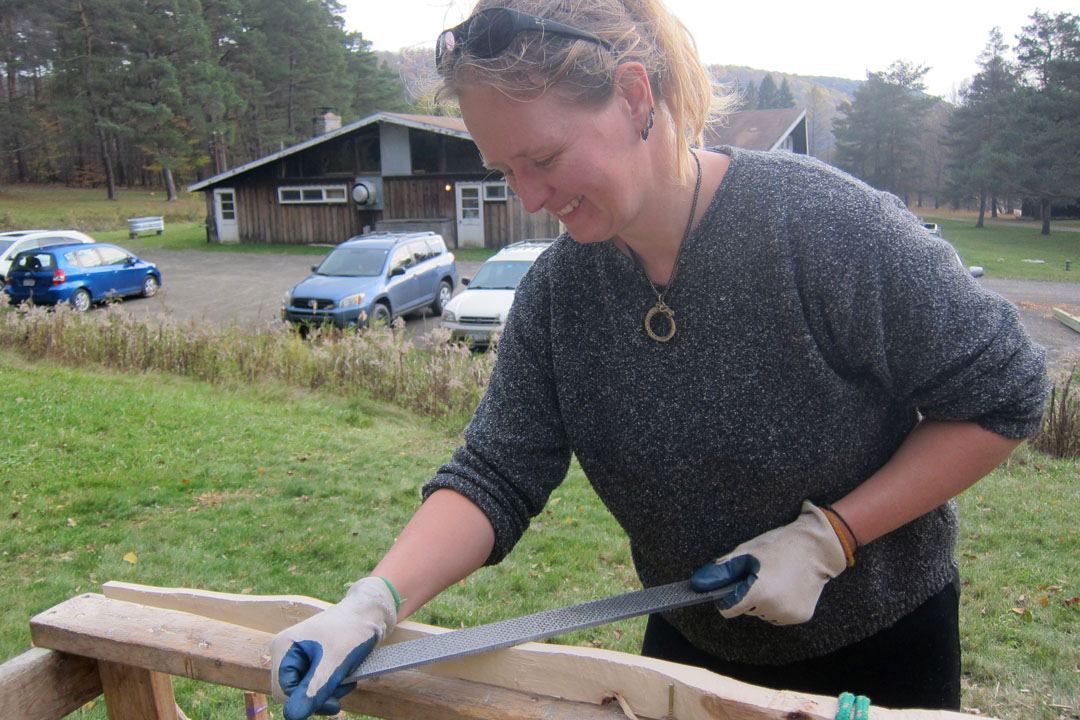
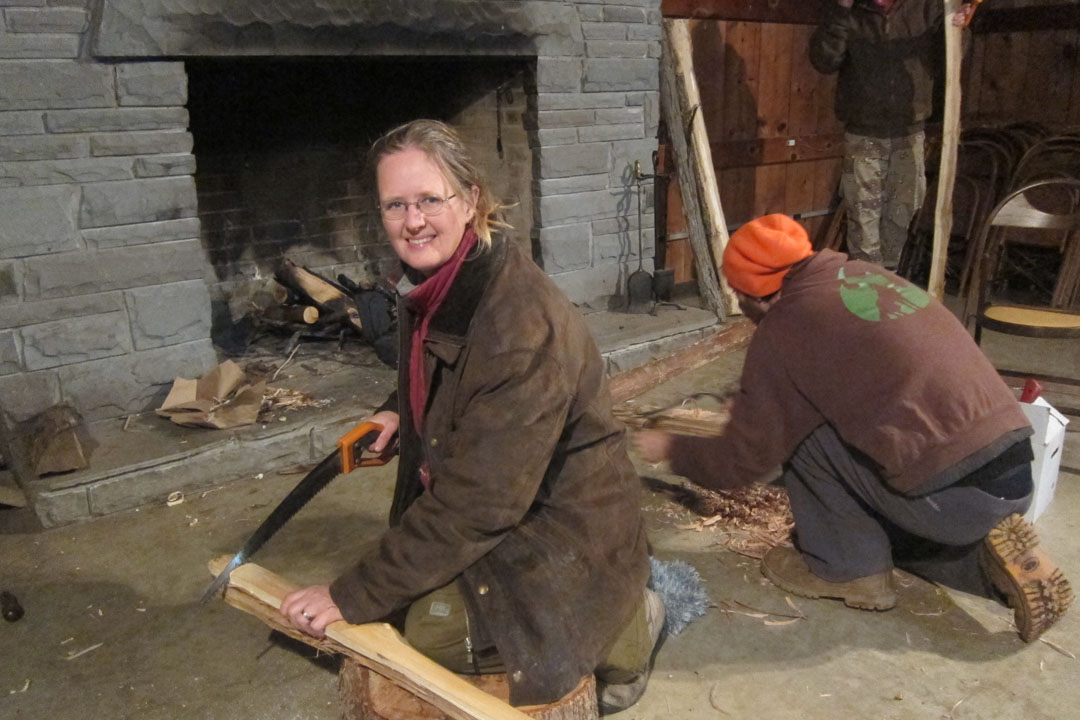
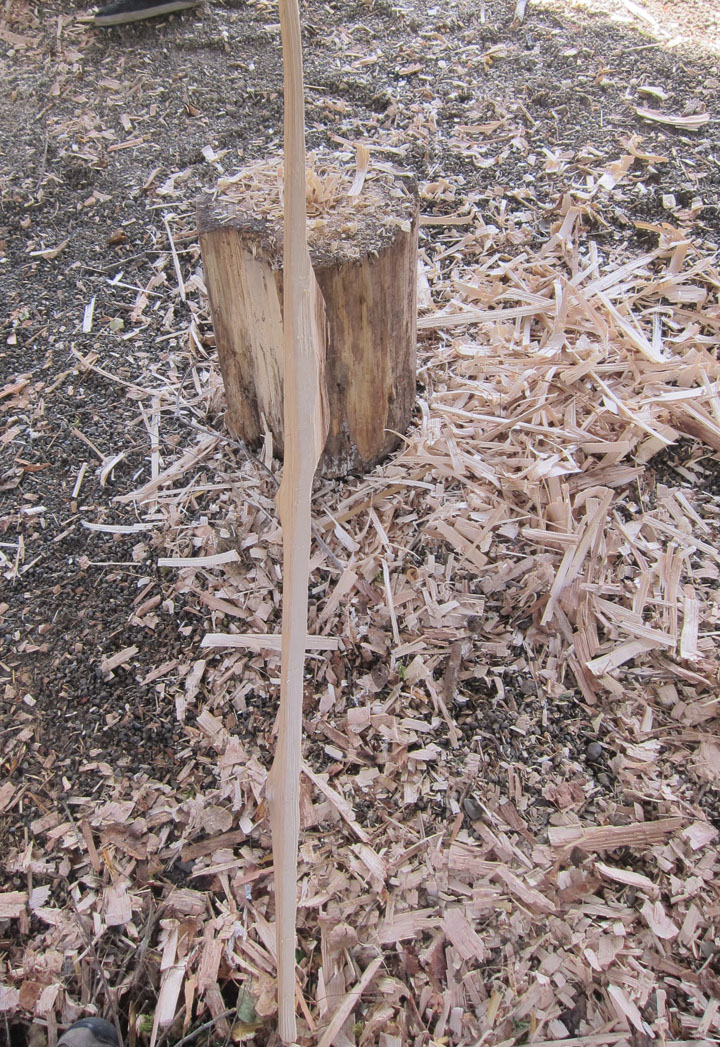
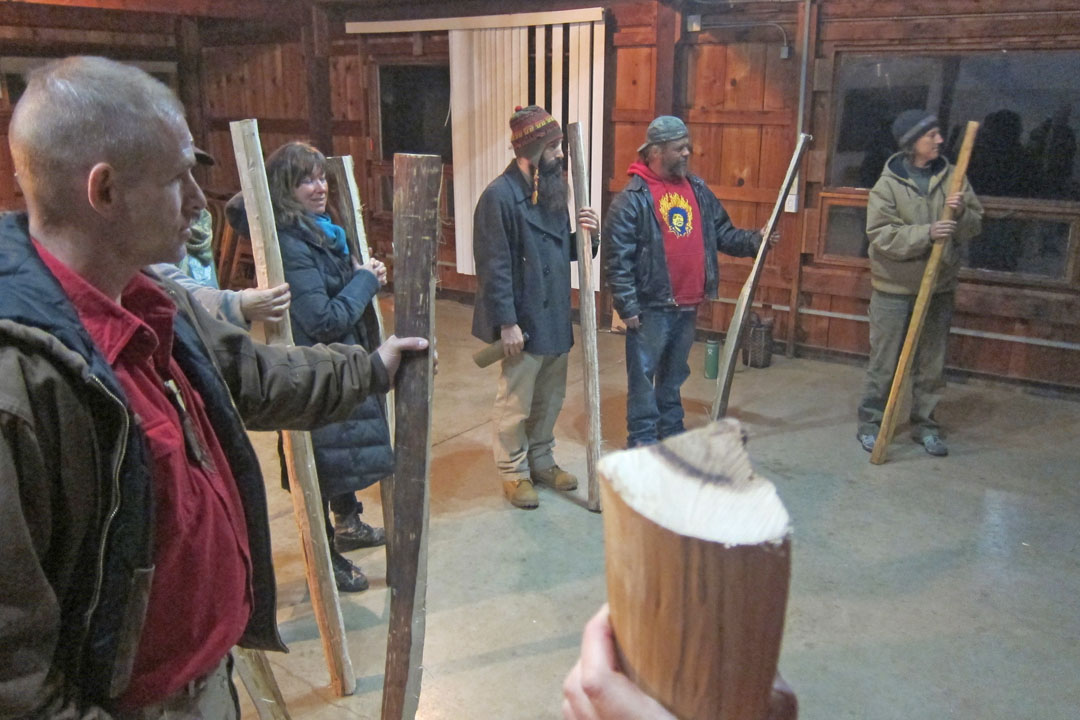
After we had carefully hacked out the main shape with the hatchet, while staying about 1/8th of an inch away from all pencil marks, the bow was now ready for rasping and scraping. Using one of the clamp stations, I clamped down my bow and with a farrier’s hoof rasp started scraping off all tool marks right up to the pencil marks, leveled the back of the limbs, and shaped the handle. Most important in this stage is to keep checking progress so as to not go too fast, and to check both edges for symmetry (one limb side should not higher or lower than the other). The limbs are only as thick as their thinnest part, and special care needs to be taken in this regard, especially where the handle 
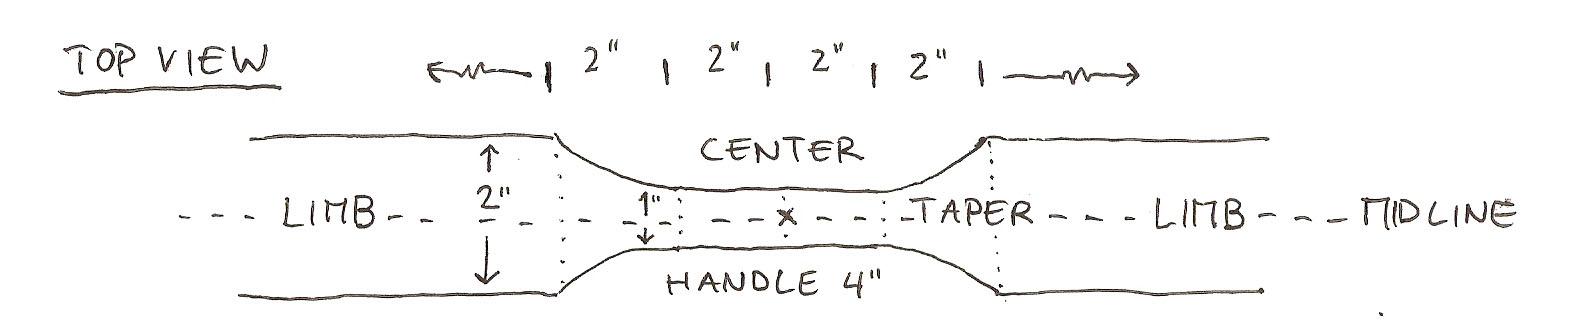
tapers off into the limb. From there on it’s pretty simple. The widest and thickest part of the limb is right at the taper of the handle, and from there the shape should gradually get narrower and thinner up to about halfway, to then thicken again to compensate for the skinny tapered tip design. Using mostly my fingers I would run them up and down the limb and feel for thickness irregularities, especially around the knots, and carefully rasp and later scrape them down. The thinnest part of the limb is about halfway, which is where most energy is stored, and therefore the most bend should happen when pulled back to fire.

The thinner middle in this drawing is exaggerated to give you the general idea.

Instructor Sean marking the belly of my bow.

From this time on, the instructors were kept busy and would regularly swing by to check our bows, adding crosses to show where to stay away and squiggles where more wood needed to be removed. This step was quite a challenge as it is hard to see; the differences are minute and were mostly only ‘visible’ by touch. It sure helped that I have experience throwing pottery, as that’s all about seeing with your fingertips too! Interestingly, as our instructors would remind us now and then, we’re still not making a bow – we’re making a bow shaped sculpture! Not until the tillering stage, where the limbs are starting to get flexed, is the bow sculpture slowly transforming into a bow.

Hard at work rasping and shaping the sides and handle of the bow ‘sculpture’.

It’s starting to look like something!

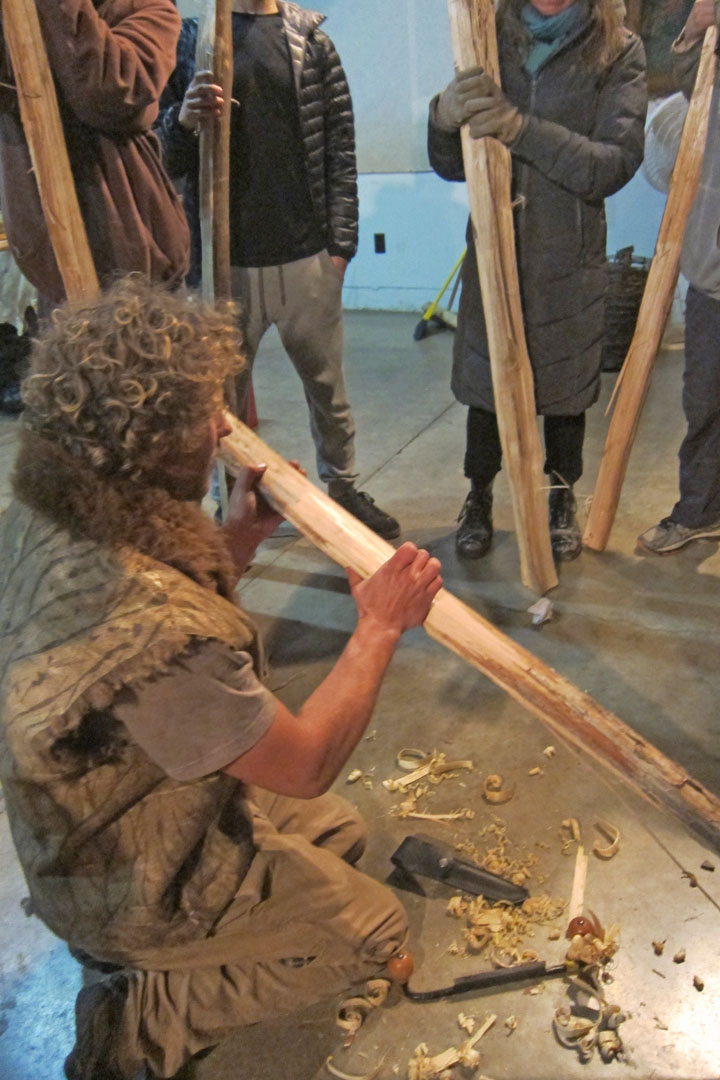
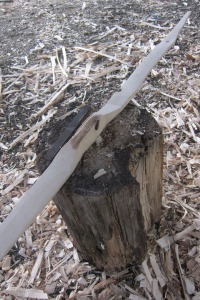
When the limbs of the bow finally start to have a little bend, as tested by gently bending, it finally is tillering time! The first tentative bending is done by putting the tip on something solid like a concrete floor, pushing away on the handle with one hand (and that elbow braced on your hip if needed) – nowhere else – and steadying the upper tip with the other: the wood remembers stress and the wrong pressure in the wrong place can permanently alter the flex of the limb! Now the rasp gets put away and the scraping knife is put to good use. We used knives similar to carving knives, fairly long but with a slight burr added to one edge for efficient scraping. And once again, all tool marks, now from the rasp, are carefully removed and the backs of the limbs are smoothed out. Then it is a matter of carefully removing layers of wood from the belly of the limbs until they started bending more and more, 
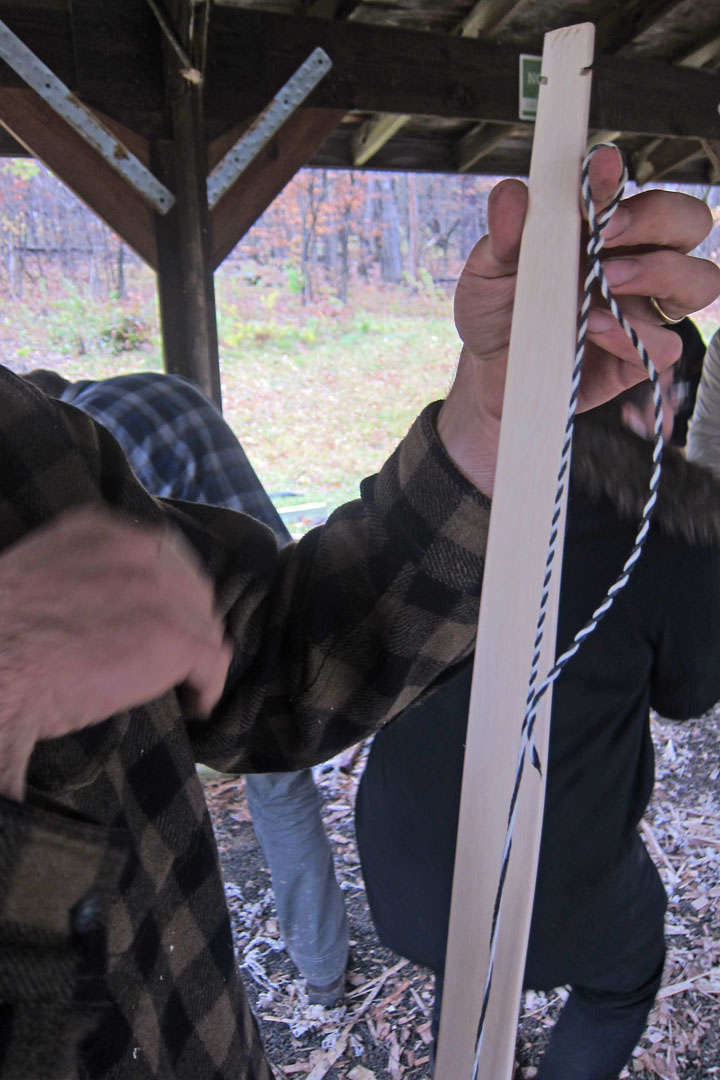
and more evenly. Also at this time we made a bowstring using the Flemish twist technique, and added nock points to the bow tips with a small saw (handmade by three hacksaw blades taped together). Carving or filing nock points works as well; just don’t carve into the back of the bow, only the sides and belly. The string would still be fairly long, so the bow bends shallowly and gently gets accustomed to becoming a bow.

Knock points are added and string is made

With each removal & tillering check, we would string the bow and flex it shallowly about thirty times to exercise the stave so the wood becomes used to the flexing and compression needed for proper bow function. This exercise is also important as the changes just made with scraping take a while for the wood to remember and might not show up in 
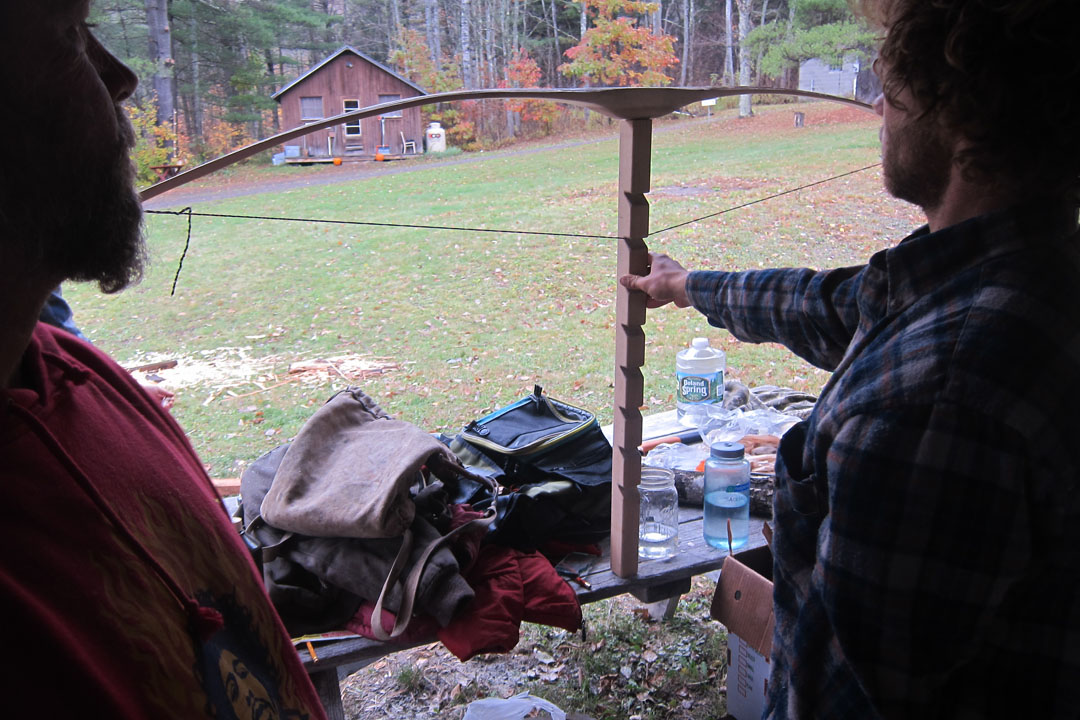
the next tillering if proper exercise is omitted. We tillered both using a tillering stick, and with the help of our instructors and fellow students by putting a foot on the string and pulling the bow stave up while they would squat in front, look & critique. It was very instructive to see many types of trees and bow shapes and strengths and 
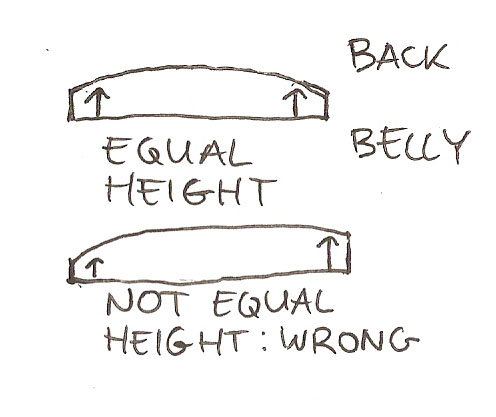
see how the limbs would bend differently from one to the other. The big thing to look for is where does it bend. Where does the limb curve, and where does it not? Ideally, the bow limbs curve most in the middle, with a bit less at the beginning near the handle, and near the end at the nock point. Where it bends too much (it’s thinnest there), wood needs to be removed

 dia5
 everywhere else, and where it is too stiff wood should be removed right there. Note that adding wood is not an option! And always check the edges of the bow to make sure they have the same thickness; that it does not slant from one side to the other, as this could introduce weakness and even twist.
Fairly quickly my bow stave was bending well and looking good. Interestingly, the limb with the two knots curved beautifully right from the start. The knot free limb had a reflex which was messing with the tillering, it kept looking flat and stiff. Rather than overcompensate and weakening that spot, the instructor decided it was easier to just heat treat the reflex straight. Which probably looked a whole lot easier than it was. When both limbs had a good bend, and looked even (also check the negative space when strung between stave and string), the bow still was too heavy for me. It drew in the upper forties which I thought is a bit much. But as the tillering was correct, instead of messing with the belly of the bow and making it thinner, which could change the tillering, now the best option is to make it narrower and thus remove from the sides. There is a balance between how thick a bow limb should be and how wide, as a wider bow has more air resistance which needs compensation in strength while thinning makes it weaker. Thus with the lower poundage draw weights it is better to go narrow in width than lose too much thickness. As mentioned before, twice as thick is eight times as strong, so taking off a little belly could quickly be way too much…

Looking for proper bend using the tillering stick: the middle of the left limb looks flat.

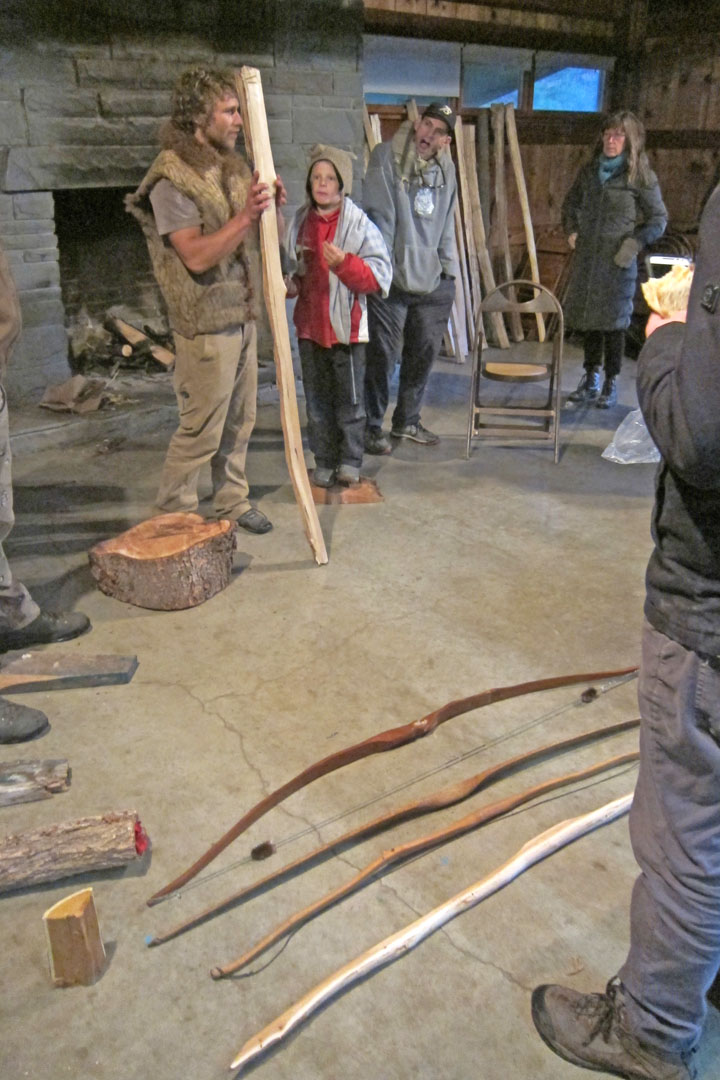
Ready for the first arrow!

Finally, the time had come to completely sand the bow (except for the back of course!), measure the right length for the bowstring (about 6 inches from the top if I remember correctly) and string it! Use a brace height of about a hand width (between string at rest and handle) and do not immediately pull to full length, go little bits at a time. Never leave a bow strung longer than it needs to be, it can develop string follow (stays slightly bend when unstrung) and loose strength. And never dry fire a bow, the energy that would otherwise travel with the arrow does not leave and can blow up the bow instead… And then the most satisfying of sounds: the thock of hitting the target with your first arrow!
The bow is still ‘young’ and needs ‘training’; exercise it regularly, shoot with it regularly, and not until it is a couple months old and you feel there is no more tweaking to be done is it time to finish. Oil, varnish or a stain – it does not really matter as long as you like it and it weatherproofs. Smooth the edges if you have not done so already. Carve pretty knock points. Add a leather wrapped handle. But most of all – take your bow and enjoy the great outdoors together!

The end: lots of happy students with their precious sticks! And each and every one looks different…

One last thing: be patient while crafting your bow. Take your time, put it away, come back to it; have a conversation. Read books, talk to bowyers: there are many different styles and techniques, and another way might work better for you. I found this course to be such fun, that I am already scouting our woods for logs to harvest, and with the experience I had enough information to make a quick bow with my son (and the band saw) from a stick harvested a couple days prior. We made it together and you should have seen him, he was so proud to shoot an arrow with a bow he’d made himself…
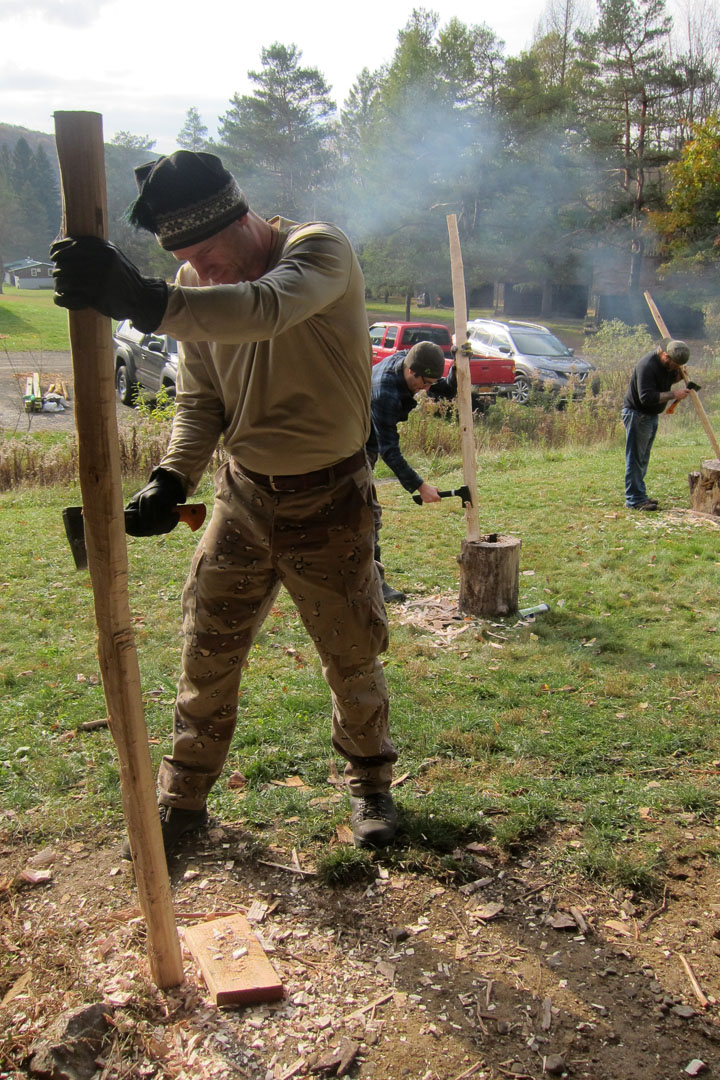
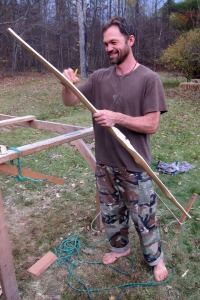
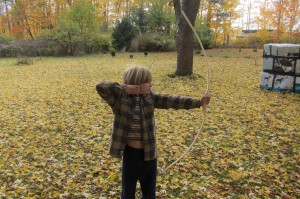
simon 
Simon (at right) with his self bow made from a 2” diameter green stick. Using a bandsaw for general shaping and tillering greatly shortened the time needed to make a bow, this one took about two hours, but also gave much more room for error as it is very quick and easy to take too much off. To save time (and limbs) a blend of modern and traditional techniques seems to work best: rough shaping with the bandsaw, and fine tuning with rasp and knife.

Want to read more?
Traditional Bowyers Bible’s Vol 1-4, Allely et al.; The Lyons Press, 2000
The Art of making Selfbows, Stim Wilcox
The Bow Builder’s Book, Horning ed.; Schiffer Publishing, Ltd., 2007
The Heritage of the Longbow, Pip Bickerstaffe; self published UK, 1999

For more information on the Bow Making Workshop. click here.

All photography and drawings by Susan Verberg, 2016.

From https://aethelmearcgazette.com/2016/11/15/from-split-log-to-bow-stave-the-last-day/

Monday, November 14, 2016

From Split Log to Bow Stave - Day Two

– my adventures at the two and a half day Bow Making Workshop at Primitive Pursuits in upstate Arnot Forest during prime fall colors…

By Elska á Fjárfella of the Dominion of Myrkfaelinn


The first cut made: the log is cut down to eye level.

Fast forward a year, and the log is peeled, dried and ready to be worked. If you know what you’re doing, it is possible to start with a live log and end with a dry bow in a couple of weeks. Luckily, at the workshop the logs were harvested the year before and dried to perfection. Now it is time to measure. We cut our log to the length of each person from floor to eye; this biometric length seems to work out for most people, and is one reason why a self bow is so personal. Then we established the back of the bow as reference. Do we include that knothole, or go around? We looked for the grain of the wood and marked the center length of our log and with pencil, dot the center width from top to bottom, while following the grain. With a straight grained log this will look like a mostly straight line from top to bottom. With knot holes (from a branch) and curves, this line will curve around & with them, and for optimal strength our bow would have to as well! With the types of trees available a flat belly bow, which is wide & thin, is a good design: the shape helps spread out compression as it is much stronger in depth than in width. The density of the wood and the poundage required give an indication as to how wide the bow should be. Twice as wide is twice as strong, twice as thick is eight times as strong!

The log’s length is measured and the exact center marked in pencil. From the center point, measure and mark a line 2” & 4” above and below. The middle 4 inches makes up the handle, and the 2” above and below will flare towards the outer edge of the bow limbs, and flare down from the handle to the belly of the limbs. Then on either side of the center line we add another line to mark the outside of our bow, about ¾ inch for a 30-40# and 1” for a 40-50# draw weight. Halfway up the bow limb we make another mark, and draw a line from there to the edge of the tip or knock point (which is about a half inch wide). This will make for a tapering shape to the top part of the bow limb, which helps reduce air drag and results in a faster, quieter and/or stronger release.


dia1
dia2

Then it’s time for some refined whacking of log with a hatchet! Day two started with this quote from the instructor: “all you have to do is cut away the wood that is not part of the bow inside”. Right! To help with coordination, the hatchet is held right below the axe head and only short quick chops are made. To help remove the excess in short chips and not long strips (which could run off right into your bow measurements by mistake) small nicks are chopped first along the path of where you intend to remove wood to cut up the wood fibers and then, layer by layer, wood chips are removed to about 1/8th to 1/4th of an inch around your pencil drawing and about three quarters of an inch for the bow limb depth.

  dia3

The bow is only as big as the deepest tool mark, so the first day of chopping was rather tentative with lots of checking and rechecking of pencil marks. By the end of the day I had the backs of the limbs, the handle and the edges roughly chopped out and was surprised at the level of precision possible with a sharp hatchet and some practice!

Using a hatchet to rough out the bow shape.

A few things to keep in mind:
– Always chop away from the center or mass. As the bow is widest at the beginning of a limb, a chop towards the ends which has a split that runs too far, will most likely miss anything important as the outer limbs taper into the nock.
– Stop regularly to check your marks.
– Keep all planes square: chop a flat belly (the part facing you when shooting) and square off the edges.
– Work on both limbs alternatively, don’t finish one and then start the other, it’s easier to keep them similar if worked on parallel.
And whatever you do, do not touch the back (the part facing away when shooting: visualize a bending person and you’ll “see” where the terminology came from) – once the surface of the back is established either by peeling or scraping the bark it is off limits!

Lots of wood chips are made...
Lots of wood chips are made…
Wood grain is like fiber rope within a tree: just as a large cable made up of lots of small wires is strong enough to moor a ship, the same is true for plant fiber; enough of them together can withstand thunderstorms! But if there is fraying or some sort of damage, then one wind gust can fell a mature tree… and one scrape, nick or dent can do enough damage to make a bow unstable and set a precedence for a fatal crack!

We finished the second day with lunch around the campfire – it was hard to put down the stave and take a break!


 lunch

 To be continued tomorrow….

https://aethelmearcgazette.com/2016/11/14/from-split-log-to-bow-stave-day-two/ 

Sunday, November 13, 2016

From Split Log to Bow Stave: Day One

my adventures at the two and a half day Bow Making Workshop at Primitive Pursuits in upstate Arnot Forest during prime fall colors…

By Elska á Fjárfella of the Dominion of Myrkfaelinn.
 
When my hubbie decided he needed a better bow, he teamed up with Edward of Delftwood to make a longbow from a premade bowstave. It took him about six trips to Syracuse to get her done, and the bow he made is an absolutely gorgeous contrasting color triple layer laminate with a narrow “D” profile, made with plausible period materials and techniques. And while laminating is a period technique (one only has to think of the short, curved horse bow of the Mongol hordes) it’s not what came to my mind when he talked about making a longbow. I’d thought of stone age bows… Norse longbows… the incredible English longbows…

Reading up on the subject I quickly realized that what I like are self bows made from one piece of wood, especially ones with character (also called flaws). I could not find anyone to help learn about making self bows, but fortunately, we live in an area with an active primitive skills group of people (or Ithaca hippies, and do they look the part…). As part of the Primitive Pursuits outdoor classroom, which specializes in kid’s summer camps and after school programs but also has occasional adult weekend workshops, once a year a Bow Making Workshop is offered right here in town! And this year I decided to take the plunge…

Our son Simon checking out the different self bows on display.
Our son Simon checking out the different self  bows on display.

With just a couple of common tools like a rasp, a knife and an axe, and the abundance of his surroundings any person could, and can, make a bow strong enough to take a deer. Actually, a metal rasp, knife and axe is not even necessary, as one of our teachers demonstrated: he’d made a bow with a stone axe and a flint scraper he’d made himself, as well as creek sand as both file and sanding paper and it was completely indistinguishable from the bows made using modern tools! Like Europe, the American northeast has abundant hardwood forests with many suitable trees, and making a bow suitable to hunt from locally harvested materials is not out of our reach at all, even for us modern people!

First things first. We started the workshop with a sing-along to honor the trees and say thanks. Not something I am used to, but nice in a graceful kind of way. Then our two instructors introduced themselves: Justin, barefooted and wearing an inside out sheepskin vest and Sean, also barefooted and pledged to eat and work from and with local materials only (he had a smoked squirrel for lunch). And while normally feeling a bit out of norm as homesteaders etc, here I was likely one of the more normal ones of the dozen and a half students! I felt right at home…

Talking about wood.
Talking about wood.

Then we got right into bow making. As the bones of a bow is the wood, good care needs to be taken to find a suitable log. As a general rule, dense hardwoods like hickory, maple, oak, ash, and elm make good bows. Conifers like pine do not, and softwoods like willow and basswood do not either. Of course, the exception to this rule is yew, which is a low density conifer and makes awesome bows. But it also needs fairly specific strategies to work well with and is therefore not recommended for the beginner.

Next up is the quality of the wood. Of course, ideal would be a perfectly straight 6 to 7 foot, knot free trunk to be split into log staves. But who’s got one of those… Making a bow is much more forgiving that I expected and if reasonable care is taken in having a mostly straight, mostly knot free log, apparently it will be fine. What is to be avoided are twist and bends, especially for the beginner. A little twist could be worked around, and a reflex or deflex bend could be removed with heat, but these are more advanced techniques. Know your limitations and keep looking to find a log to go with your comfort level.

Demonstrating how to safely remove bark.

Our logs were cut between 6-7 feet (to fit the instructor’s truck bed). A 4-6” diameter log could be split in half for two staves, using a wedge, a mallet and some splitting wedges to keep the split going. When it is split wood glue is put on the ends. Paint and beeswax works as well, the advantage of wood glue being that it also works under tension (it’s stretchy) and can sometimes prevent cracks that might otherwise have happened anyway. The logs are dried in a cool dry place, like a garage or basement. Whatever you do, stay away from the hot woodstove!

About half of the split logs the students could choose from had the bark already removed as they were harvested in the summer, which was very convenient. Removing the bark facilitates drying and also prevents bark beetles from taking up home and destroying the potential stave. Some people advise getting winter wood as the wood is driest that time of year, others advise getting summer wood as the bark peels off easily. The grain of the wood gives a bow its strength and flexibility, but only if the back is one continuous growth ring from top to bottom. With the types of trees mentioned, the wood right below the bark is the wood used for making a bow, and baring the growth ring is easy if the bark is loose and can be peeled right off. The exceptions are locust and osage orange, where the outer sapwood needs to be removed and only the inner core is used. If the bark is not loose, it can also be carefully peeled first with a drawknife and finished with a scraping knife. Using a drawknife is an acquired skill, so practice first on some scrap wood until you get a feel for what’s happening. Whichever way you choose, always make sure to peel away from knots so as not to violate the grain curving around imperfections. Grain does not tend to go straight, so keep a close eye on what’s going on and always, always follow the ‘yellow brick’ grain.

dayone
End of day one, each with our own split log. I choose a piece of shagbark hickory.

To be continued tomorrow…..

https://aethelmearcgazette.com/2016/11/13/from-split-log-to-bow-stave-day-one/