– my adventures at the two and a half day Bow Making Workshop at
Primitive Pursuits in upstate Arnot Forest during prime fall colors…
By Elska á Fjárfella of the Dominion of Myrkfaelinn

Fast forward a year, and the log is peeled, dried and ready to be worked. If you know what you’re doing, it is possible to start with a live log and end with a dry bow in a couple of weeks. Luckily, at the workshop the logs were harvested the year before and dried to perfection. Now it is time to measure. We cut our log to the length of each person from floor to eye; this biometric length seems to work out for most people, and is one reason why a self bow is so personal. Then we established the back of the bow as reference. Do we include that knothole, or go around? We looked for the grain of the wood and marked the center length of our log and with pencil, dot the center width from top to bottom, while following the grain. With a straight grained log this will look like a mostly straight line from top to bottom. With knot holes (from a branch) and curves, this line will curve around & with them, and for optimal strength our bow would have to as well! With the types of trees available a flat belly bow, which is wide & thin, is a good design: the shape helps spread out compression as it is much stronger in depth than in width. The density of the wood and the poundage required give an indication as to how wide the bow should be. Twice as wide is twice as strong, twice as thick is eight times as strong!
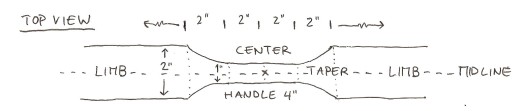
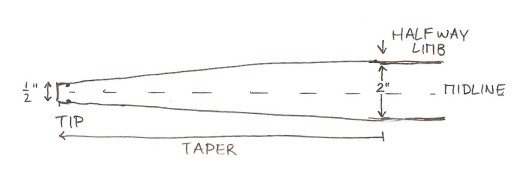
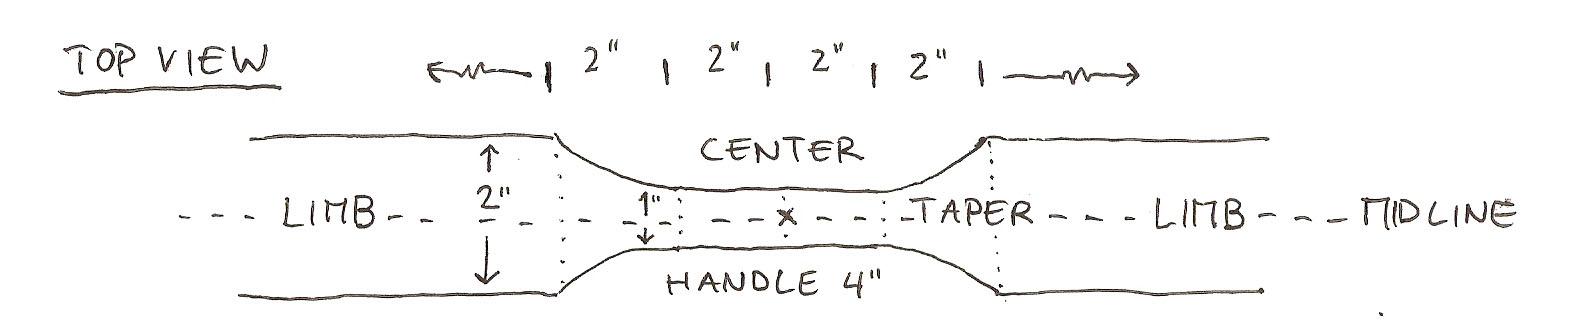
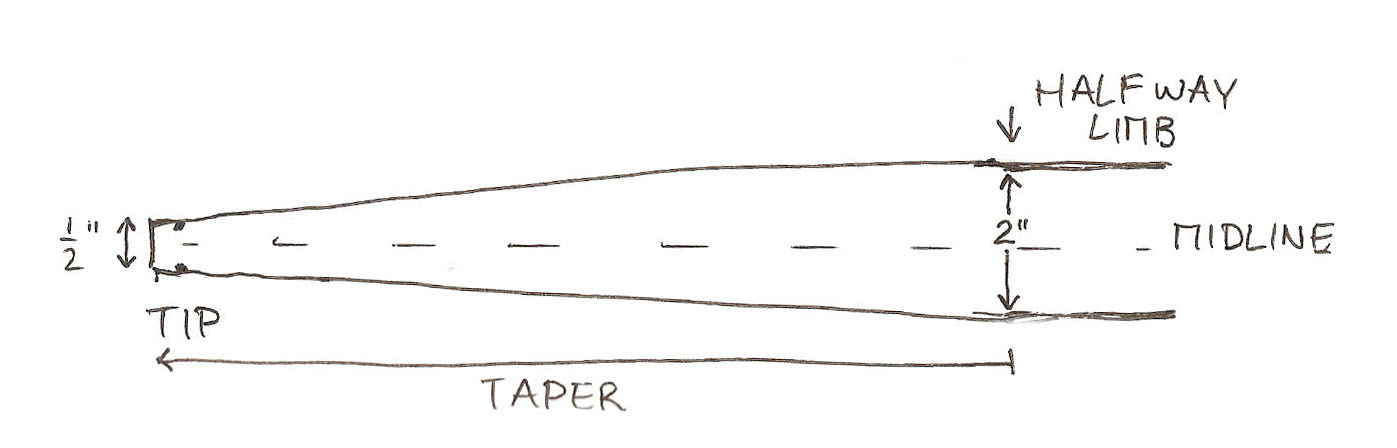
The log’s length is measured and the exact center marked in pencil. From the center point, measure and mark a line 2” & 4” above and below. The middle 4 inches makes up the handle, and the 2” above and below will flare towards the outer edge of the bow limbs, and flare down from the handle to the belly of the limbs. Then on either side of the center line we add another line to mark the outside of our bow, about ¾ inch for a 30-40# and 1” for a 40-50# draw weight. Halfway up the bow limb we make another mark, and draw a line from there to the edge of the tip or knock point (which is about a half inch wide). This will make for a tapering shape to the top part of the bow limb, which helps reduce air drag and results in a faster, quieter and/or stronger release.

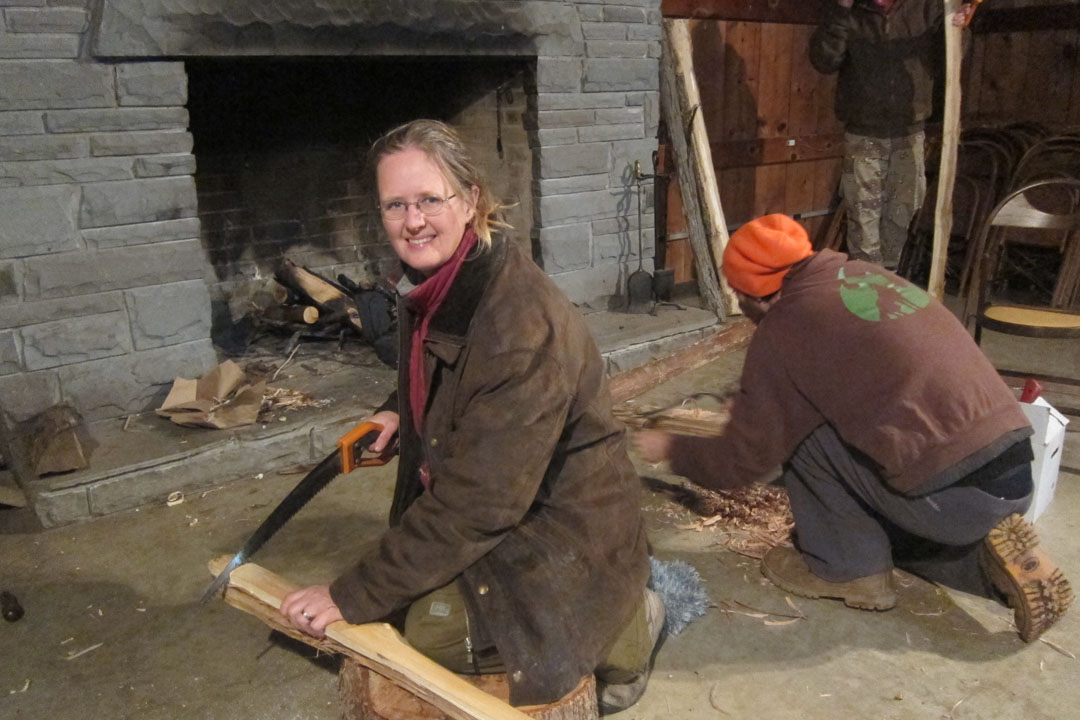
Then it’s time for some refined whacking of log with a hatchet! Day two started with this quote from the instructor: “all you have to do is cut away the wood that is not part of the bow inside”. Right! To help with coordination, the hatchet is held right below the axe head and only short quick chops are made. To help remove the excess in short chips and not long strips (which could run off right into your bow measurements by mistake) small nicks are chopped first along the path of where you intend to remove wood to cut up the wood fibers and then, layer by layer, wood chips are removed to about 1/8th to 1/4th of an inch around your pencil drawing and about three quarters of an inch for the bow limb depth.
The bow is only as big as the deepest tool mark, so the first day of chopping was rather tentative with lots of checking and rechecking of pencil marks. By the end of the day I had the backs of the limbs, the handle and the edges roughly chopped out and was surprised at the level of precision possible with a sharp hatchet and some practice!

A few things to keep in mind:
– Always chop away from the center or mass. As the bow is widest at the beginning of a limb, a chop towards the ends which has a split that runs too far, will most likely miss anything important as the outer limbs taper into the nock.
– Stop regularly to check your marks.
– Keep all planes square: chop a flat belly (the part facing you when shooting) and square off the edges.
– Work on both limbs alternatively, don’t finish one and then start the other, it’s easier to keep them similar if worked on parallel.
And whatever you do, do not touch the back (the part facing away when shooting: visualize a bending person and you’ll “see” where the terminology came from) – once the surface of the back is established either by peeling or scraping the bark it is off limits!

Wood grain is like fiber rope within a tree: just as a large cable
made up of lots of small wires is strong enough to moor a ship, the same
is true for plant fiber; enough of them together can withstand
thunderstorms! But if there is fraying or some sort of damage, then one
wind gust can fell a mature tree… and one scrape, nick or dent can do
enough damage to make a bow unstable and set a precedence for a fatal
crack!
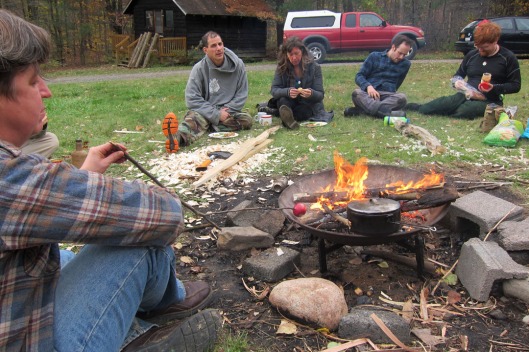
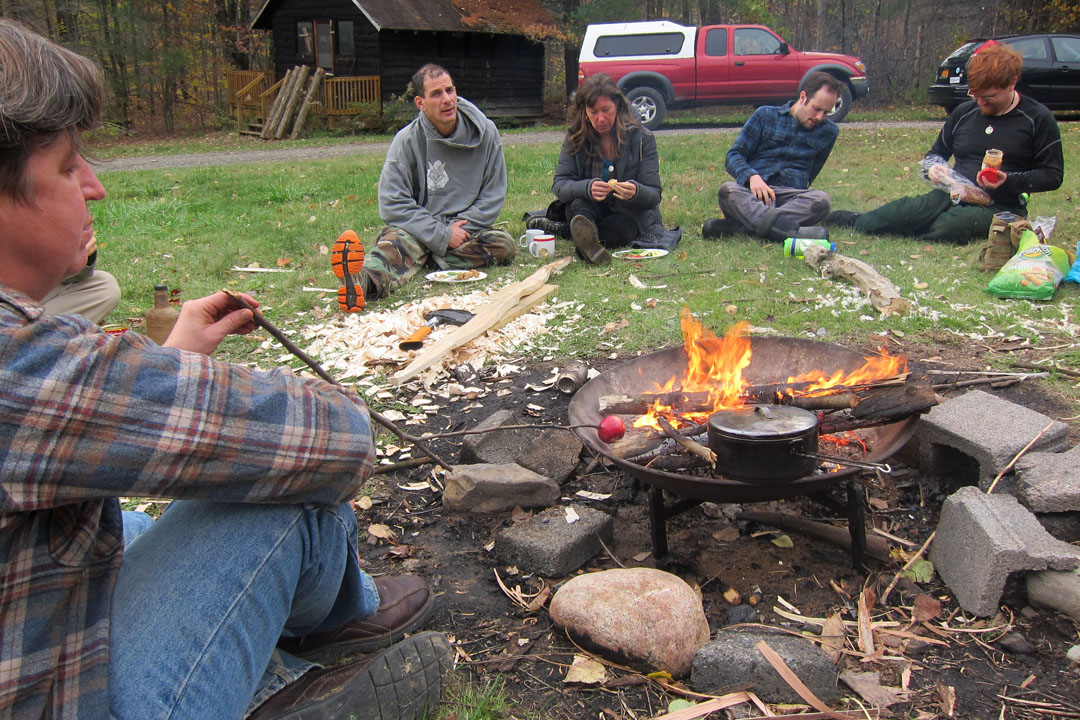
We finished the second day with lunch around the campfire – it was hard to put down the stave and take a break!
To be continued tomorrow….
https://aethelmearcgazette.com/2016/11/14/from-split-log-to-bow-stave-day-two/
By Elska á Fjárfella of the Dominion of Myrkfaelinn
The first cut made: the log is cut down to eye level.
Fast forward a year, and the log is peeled, dried and ready to be worked. If you know what you’re doing, it is possible to start with a live log and end with a dry bow in a couple of weeks. Luckily, at the workshop the logs were harvested the year before and dried to perfection. Now it is time to measure. We cut our log to the length of each person from floor to eye; this biometric length seems to work out for most people, and is one reason why a self bow is so personal. Then we established the back of the bow as reference. Do we include that knothole, or go around? We looked for the grain of the wood and marked the center length of our log and with pencil, dot the center width from top to bottom, while following the grain. With a straight grained log this will look like a mostly straight line from top to bottom. With knot holes (from a branch) and curves, this line will curve around & with them, and for optimal strength our bow would have to as well! With the types of trees available a flat belly bow, which is wide & thin, is a good design: the shape helps spread out compression as it is much stronger in depth than in width. The density of the wood and the poundage required give an indication as to how wide the bow should be. Twice as wide is twice as strong, twice as thick is eight times as strong!
The log’s length is measured and the exact center marked in pencil. From the center point, measure and mark a line 2” & 4” above and below. The middle 4 inches makes up the handle, and the 2” above and below will flare towards the outer edge of the bow limbs, and flare down from the handle to the belly of the limbs. Then on either side of the center line we add another line to mark the outside of our bow, about ¾ inch for a 30-40# and 1” for a 40-50# draw weight. Halfway up the bow limb we make another mark, and draw a line from there to the edge of the tip or knock point (which is about a half inch wide). This will make for a tapering shape to the top part of the bow limb, which helps reduce air drag and results in a faster, quieter and/or stronger release.

Then it’s time for some refined whacking of log with a hatchet! Day two started with this quote from the instructor: “all you have to do is cut away the wood that is not part of the bow inside”. Right! To help with coordination, the hatchet is held right below the axe head and only short quick chops are made. To help remove the excess in short chips and not long strips (which could run off right into your bow measurements by mistake) small nicks are chopped first along the path of where you intend to remove wood to cut up the wood fibers and then, layer by layer, wood chips are removed to about 1/8th to 1/4th of an inch around your pencil drawing and about three quarters of an inch for the bow limb depth.
The bow is only as big as the deepest tool mark, so the first day of chopping was rather tentative with lots of checking and rechecking of pencil marks. By the end of the day I had the backs of the limbs, the handle and the edges roughly chopped out and was surprised at the level of precision possible with a sharp hatchet and some practice!
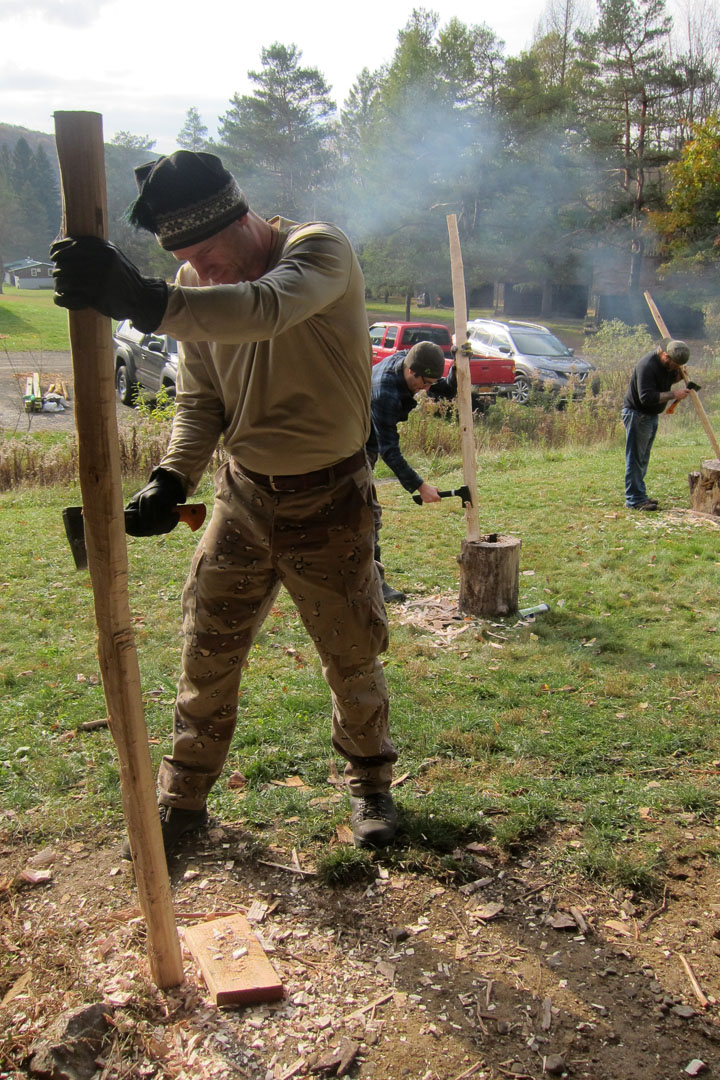
Using a hatchet to rough out the bow shape.
A few things to keep in mind:
– Always chop away from the center or mass. As the bow is widest at the beginning of a limb, a chop towards the ends which has a split that runs too far, will most likely miss anything important as the outer limbs taper into the nock.
– Stop regularly to check your marks.
– Keep all planes square: chop a flat belly (the part facing you when shooting) and square off the edges.
– Work on both limbs alternatively, don’t finish one and then start the other, it’s easier to keep them similar if worked on parallel.
And whatever you do, do not touch the back (the part facing away when shooting: visualize a bending person and you’ll “see” where the terminology came from) – once the surface of the back is established either by peeling or scraping the bark it is off limits!
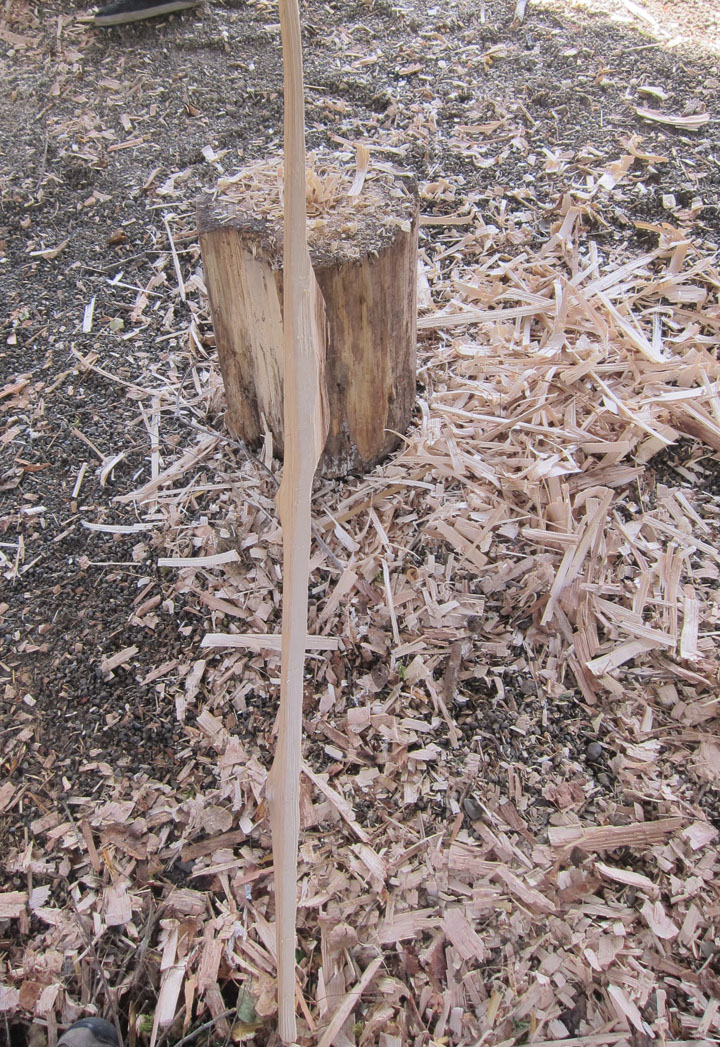
Lots of wood chips are made…
We finished the second day with lunch around the campfire – it was hard to put down the stave and take a break!
To be continued tomorrow….
https://aethelmearcgazette.com/2016/11/14/from-split-log-to-bow-stave-day-two/
No comments:
Post a Comment