Showing posts with label Practical Projects. Show all posts

Wednesday, November 7, 2018

Brewing Hacks for the Homestead

I've been brewing for a few years now, and along the way learned some neat tricks and tools I'd like to share with you. Some are more obvious, others maybe not, but hopefully they'll make your life easier brewing, just as they do mine.


 #1 The Dishwasher Rack.
The cleanest part in any kitchen, easy to sanitize and with a built-in drain, the bottom drawer of a dishwasher. I use mine right after a wash, to stack and dry bottles, one gallon carboys, funnels, filters, airlocks, buckets and even the occasional 5G carboy.

#2 The 5G carboy dryer.
A small stand to dry your carboy upside down while staying sanitized. One of those things that seems obvious once you know, but took me a few years to find out about!
https://www.northernbrewer.com/products/red-carboy-dryer


#3 A spray bottle.
I use Star-San for all my sanitizing needs, and always have a spray bottle of it available as well. It helps to sanitize small things, like airlocks and rubber stoppers (which then are dried on the dishwasher rack). I like it best to help sanitize hard to get to places without submerging in a large container, like my large funnel, and mos especially, my honey filter.


#4 The honey filter.
A new addition to my mead and wine making equipment is the honey filter. As I often ferment on fruit I get a LOT of pulp, and most filters, including brewing funnel filter inserts, cheesecloth and  milk filters, clog up way too fast. But not the honey filter! Having smaller holes than a standard metal kitchen sieve, the mesh is large enough to filter most of the fruit parts without clogging near immediately. The pulp gets separated when settled in the next racking.
https://www.betterbee.com/wax-processing/fc1-filter-cone.asp

#5 The sanitized airlock.
To keep the airlock sanitized in case of draw-back (where temperature change causes the bucket to contract and instead of pushing air out, sucks the airlock liquid back in) for the longest time I would fill it with grain alcohol. But at $20 a bottle that was starting to add up. Then someone told me the secret... to add Star-San instead. Not only is this sterile, this liquid will also show yeast activity as the air bubbles will create soap-like bubbles within the airlock. And there is always spare after sanitizing our equipment.

Keep Calm, and Brew on!

Sunday, July 22, 2018

Yogurt from store-bought starter

Each spring and summer our homestead produces a bounty of fresh goat's milk from our small backyard herd of Saanen cross goats. While we make many things with the milk - from custard to soft cheese chèvre and even goat's milk soap - my family's favorite is yogurt. There are many methods of making yogurt, often using specialty cultures bought from cheesemaking supplies and specialized yogurt incubators. To avoid having to buy & ship cultures and owning another piece of equipment, I found a fool-proof way of making yogurt with off-the-shelf yogurt and my oven. We now enjoy fresh yogurt whenever we like!

My doe Gazelle with her Saanen x Nubian twins.

Yogurt is a fermented milk product that provides digested lactose and specific viable bacterial strains, typically Streptococcus thermophilus and Lactobacillus bulgaricus. It is a source of several essential nutrients, including protein, calcium, potassium and vitamins B2 and B12. With the domestication of milk-producing animals like cows, sheep and goats, as well as horses, buffalo and yaks, milk products became a part of the human diet. It is generally thought yogurt, and other fermented milk products, were discovered by accident as a result of milk being stored by primitive methods in warm climates. Milk spoils easily, making it difficult to use. Herdsmen in the Middle East discovered that milk carried around in bags make from intestinal gut would cause the milk to curdle and sour - the rennet from the intestinal juices would preserve and help conserve the otherwise easy to spoil milk for extended periods of time. For millennia, making yogurt was the only known safe method for preserving milk, other than drying it in the form of cheese. The Greeks were the first to write about yogurt at around 100BC, mentioning the use of it by barbarous nations. Genghis Khan reputedly fed his army yogurt - already a staple of the Mongolian diet - because he thought it instilled bravery in his warriors! It is generally thought the word 'yogurt' comes from the Turkish word 'yoğurmak,' which means to thicken or curdle.

The first industrialized production of yogurt started in 1919 in Barcelona by Isaac Carasso – he named the company 'Danone,' or 'Little Daniel,' for his son. While Turkish immigrants had brought yogurt to North America in the 1700s, it did not really catch on until the 1940s. That is when Daniel Carasso, the son of Danone founder Isaac, and Juan Metzger took over a small yogurt factory in the Bronx, New York, renamed it Dannon and quickly introduced yogurt with fruit on the bottom in 1947. The popularity of yogurt soared in the 50s and 60s with the boom of the health food culture and is now readily available in many varieties, including sheep and goat's milk yogurt. The types of yogurt typically available today are influenced by local traditions and lifestyles. For instance, Eastern European and Asian cultures have the milk undergo an alcoholic fermentation to make kefir and koumis. In Spain and Germany, yogurt is typically heat-treated to kill the bacteria, and in the United States as well as other countries, various probiotics and/or prebiotics are added to the mix.

It has been my experience that certain off-the-shelf yogurts work much different than others - they all make yogurt but some of the textures were not what I would call pleasing. From all the different yogurt brands I’ve played with, Stonyfield Organic is the most consistent. It is important to make sure the jars are sterile to avoid contamination with unwanted bacteria and yeasts, and to start with a healthy starter to promote vigorous fermentation of the right cultures. Especially households that make other ferments like vinegar, bread and kefir do well to pay close attention to cleanliness. But once you've got your ducks in a row, the actual process of making yogurt is pretty simple and takes less effort than you might expect!

Yogurt starter, milk and heat – all the essentials for wholesome homemade yogurt!

What you'll need:
- one gallon organic whole milk (I use raw backyard goat milk)
- 1 to 2 cups of Stonyfield Organic Yogurt (I use low fat as I am cow dairy sensitive)
- stainless steel pot or a Dutch oven
- thermometer
- stainless steel wisk
- wide mouth (canning) funnel
- five mason jars with lids
 
How to sterilize?
There are several methods of sterilizing equipment: anyone who has canned before should be all set. Anything that is in contact with the milk after it is pasteurized should be sterilized; this includes the funnel, the mason jars and the lids.

As I brew as well, I sterilized my mason jars using the brewing sanitizer Star-San and stored the jars on my dishwasher drawer - this is quick and energy efficient.

Method one: run the jars and lids through the hot / canning setting of your dishwasher.
Method two: boil the jars and lids in your water-bath canner for 10 minutes (just like prepping jars for canning).
Method three: use a brewing sanitizer like Star-San, or iodine.
Method four: soak in a sterilizing bleach bath, and rinse very well afterwards.

Step by Step on making yogurt:
- Heat your milk to 182°F (this pasteurizes the milk).


- Let it sit for 10 minutes on low at around 182°F.


- Fill your sink with cold water (add some ice packs if you have them). Put the pan with hot milk in the cold water to cool the milk down to 110-120°F.
- Scoop 2 cups of Stonyfield yogurt into the lukewarm milk. If the yogurt is straight from the fridge, add at 120°F; if it is room temperature, add at around 110-115°F. You want the cultured milk to be at around 110°F.


- Gently whisk the yogurt culture into the milk. If you like, you can dilute it separately in some of your milk so it is less chunky and dissolves easier but this is not necessary.
- Pour the cultured milk into mason jars (use wide mouth funnel) and close the lid.


- Put the mason jars with cultured milk into the oven – leave the pilot or the general light on.


- Leave overnight, the next morning your yogurt is ready for consumption (after that, refrigerate).

Some beautiful fermentation is visible at the rim of the fresh yogurt.

The trick to culturing yogurt is to use a (turned off) kitchen oven as an incubator – it is well insulated and every house has one. If you have an old-fashioned gas stove which lights with a pilot light, that is all it needs to stay all nice and cozy inside. If your oven does not have a pilot light, it should have a regular light bulb to see what is going on inside. Leave that on (with the door closed), and it will keep the oven just as comfortable – a perfect environment for culturing yogurt.

Tip: if you strain your yogurt through some cheesecloth until it is as thick as you like, you just made your very own thicker Greek-style yogurt.

Reference:

DIY medieval hard white soap.


Castile soap – a well-known olive oil soap with a long-time history, it is named for the city it reportedly originated. Originally made from unfiltered olive oil and lye produced from burning the plant barilla, castile soap still has an all-natural reputation and is perfect for vegetarians and vegans as it is made of vegetable oils only. While in Spain castile soap means soap made in the Castilla area from 100% olive oil, in modern times the term ‘castile’ can have other meanings. Commercially available Castile soaps are often a blend of olive oil with coconut and palm oils, and here castile indicates the bulk of the oils comes from olives. The term castile is also used to indicate vegetable oils-only soaps, and even slightly viscous liquid soap made only with vegetable oil.

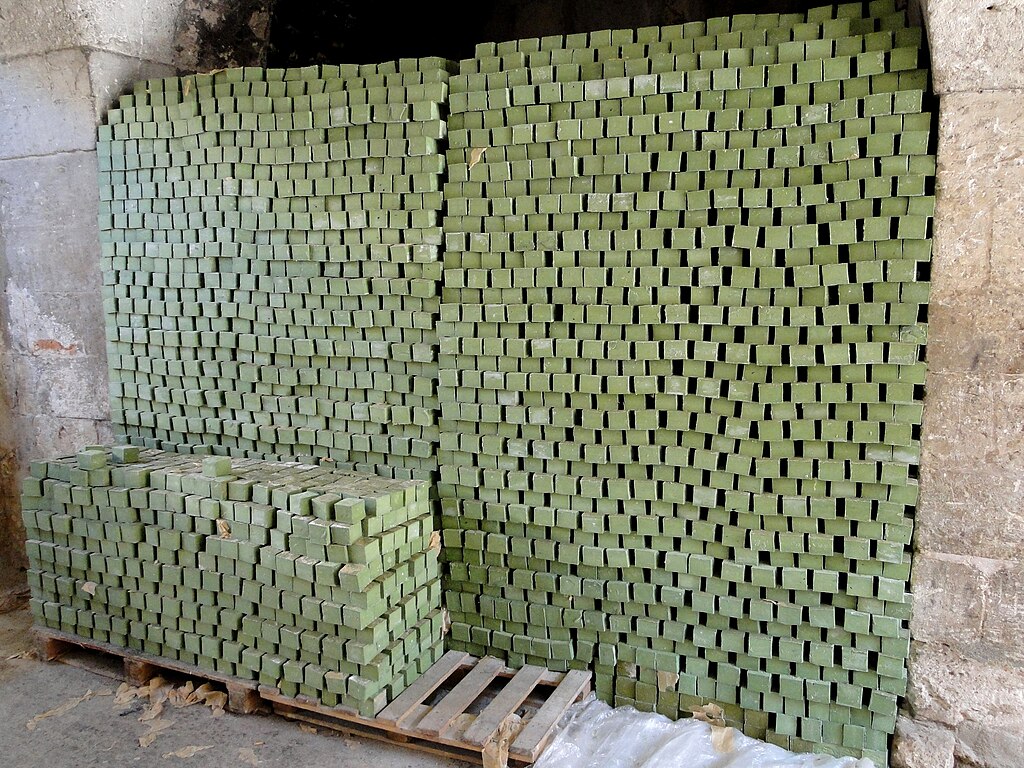
Aleppo soap 03.jpg
Aleppo soap at the Al-Jebeili factory, Aleppo, Syria (Creative Commons)

Most people are familiar with the solid bar olive oil soap and some might even know its Spanish roots. But did you know that another soap made from only olive oil, called simply ‘white soap,’ originated in Northern Italy hundreds of years before castile soap appeared in Spain? And the European claim is not even as old as the even older more fabled source – Aleppo soap, made of olive and laurel berry oils. This hard soap originated in the city of Aleppo and goes back at least a thousand years; as well as its cousin Nabulsi soap, made in Nablus, Palestine. It is generally thought that the invading ‘Moors’ of North Africa brought the technology of making hard white soap with them to medieval Southern Europe. With the prevalence of the plant barilla in Southern Europe - an essential ingredient in the making of hard soap - the craft of hard soap making was quickly picked up by the Europeans and evolved into lucrative local soap making centers, like in Castilla, Spain and in Marseilles, France.

Why go through the trouble of making your own soap?
Not all soaps are made alike and unless you know what went in it many olive oil soaps might not be as healthy as you would wish. There are different grades of olive oil, depending on how it is processed. They all work for making soap, though I would advice to stay away from pomace olive oil. While this is cheapest, there is a reason! Pomace means that it is made of the solid remains of the olive including skins, pulp, seeds, and stems, and the amount of oil left is so minimal that it cannot be extracted by pressing, but only through the combined use of chemical solvents and extremely high heat. Cheap filler oils like canola and palm oil are also often included in modern castile soaps. In the case of palm oil: unless it is certified organic and sustainably farmed, I do not use it as standard production attributes to rainforest deforestation. Olive oil-only soaps are readily available from artisanal soap makers but sometimes it’s easier – and a lot more fun – to just go ahead and make your own!

Why make soap in a soda bottle?
The exothermic or heat creating reaction of dissolving lye crystals into water heats the water to (near) boiling and creates a lot of very dangerous caustic steam. Experienced soap makers learn how to work around this, either by making lye outdoors (and being upwind ourselves), by using (partially) frozen liquid, or by using ventilation. The soda bottle method keeps the steam contained as we wait for it to cool down and condense again. Steam, as it is a water vapor, or gas, takes up more room than liquid water, and in a confined area like a bottle will build up pressure. Soda bottles are designed to take this pressure, as long as there is enough space left in the bottle to do so. Using this technique anyone can make small amounts of hard soap without the need for specialized equipment. But do always keep your wits about, as lye will always be a potentially dangerous chemical.

 
Measuring out the lye, the soap bottle and the water are at the ready.
 
Measured the oil.
Needed:
- 2 liter soda pop bottle, with lid.
- 5 gallon bucket
- Lye
- Water
- Ice cubes
- Olive oil
- Funnels (one for water, one for lye)
- Rubber spatula
- Scale, preferably digital.
- Paper Towels
- Household vinegar
- Rubber gloves
- Safety glasses

About the bottle:
PET (polyethylene terephthalate) bottles are not specifically made for extreme temperatures; they are made to withstand pressure very well, and are easy to get as 2 liter soda pop bottles. PET plastic should not contain BPA but might contain traces due to the (recycled) manufacturing process. BPA is not food safe but only releases slowly from contaminated plastic under high temperatures, and while the lye creates high temperatures, it does so only for a short while.  To minimize heat, a bucket with ice water should be at the ready before mixing the lye water.

Do NOT OVERFILL the bottle. Stick to the recommended minimal amount of oil and lye. The empty space in the bottle is needed as a pressure chamber for heat expansion. The exothermic (heat creating) reaction of dissolving lye in water, heats the water to boiling and creates lots of steam. This steam is highly caustic and VERY dangerous, hence the closed-off bottle pressure chamber.

About the lye:
Up until recently, lye would be available in the household cleaning isle of the supermarket and hardware store. Alas, as it is used to make certain other stuff, this is no more. Do not buy liquid lye to make soap, as it is not possible to measure the amount of dissolved lye correctly, plus, there are additives added you do not want in your soap. Food grade lye can be bought over the internet and I get mine from here: http://essentialdepot.com/

About Safety:
When working with sodium hydroxide lye ALWAYS wear SAFETY GLASSES. It is recommended to wear gloves, and always have household vinegar nearby for the unexpected splash or droplet. Wear closed shoes and long sleeves if possible.

For a nice amount of hard soap for personal use a 10 ounce olive oil batch works well.

Step by step:

  • Measure 10 weight ounces of (room temperature) olive oil.
  • Measure 1.26 ounces of lye.
  • Measure 2 ounces of cold water.

- Fill a 5 gallon bucket with a water and ice mixture.
- Add water to soda bottle with funnel.
- Slowly but steadily add lye crystals to water in bottle with the other dry funnel.
- When done, close lid immediately, and shake gently.
- Stick into ice-water right away when all the lye is dissolved.
- The bottle will start to fill with steam, get scorching hot and swell. Do not touch at the bottom! It should already be in the ice-water.
- After about 5-10 minutes check bottle.
- If the bottle’s bottom shrank, it could benefit from ice-water a little quicker next time.
- The steam should be condensing on the sides and run down in droplets.

 Water droplets condensing on the sides.

A slightly overheated shrunken soap bottle bottom.

- When the bottom of the bottle, with the liquid, feels not cold nor warm (body temperature, also called blood warm) it is time.
- Open bottle cap, and add oil to blood warm lye.

Oil sitting on top of lye water.

      All mixed up by shaking.

- And now it’s time to shake your booty! Do put the cap back on first.
- Shake, shake, and shake some more…
- When the soap starts to stick and coat the sides of the bottle like custard, it is good.

Raw soap at the ‘custard’ stage.

If you like, this is the moment you can pour the soap into a mold, or into a small water bottle to make soap rounds (for instance to make felted soap). Remove the top of the bottle first, and use a rubber spatula to get it all out.


If you do not intend to mold, remove the lid, set it somewhere safe and let it sit open until the sides of the soap are totally firm. Cut off the top of the bottle, and pop out your block of soap!

Cut your soap to size in a week or so (do not wait too long, olive soap is notorious for getting crumbly) Let the pieces dry on a cookie drying rack in a cool and dark place for a minimum of three weeks.

Tip: you can let the soap dry completely in the bottle, but make sure to remove the lid. If dried in a (partially) closed environment the soap can ‘sweat’ a little – this will either go away on its own, or you can dab it dry later with a paper towel.

As with all hand made soap, when in use place the soap on a draining soap dish to let dry in between uses and it will go a long way - a green Scotchbrite pad cut in half makes a fabulous cheap soap dish. As has been said: the longer it sits, the harder it gets, and the longer it stays!


References:
Dunn, Kevin. Caveman Chemistry. Universal Publishers, 2003.
Dunn, Kevin. Scientific Soapmaking. Farmville, VA: Clavicula Press, 2010 (p.58)

About the safety of using plastic bottles:

About castile soap in general:

Creative Commons image;

Tuesday, May 1, 2018

Root Beer - with some history

As a medieval reenactor, and brewer, I was unsurprisingly asked – begged! – by my kid to help him make root beer. We both quite like the taste of root beer, and the idea of going on a root-and-herb scavenger hunt in the back swamp spoke to both of us! The cunning plan was to have the kid enter his root beer in a brewing competition hosted by a medieval reenacting Society (SCA.org) and thus he had to know at least some of its early history. But – how period is root beer? The two ingredients most often mentioned to make root beer are sarsaparilla and sassafras, so let’s first take a look at those.

sarsaparillaA Flora of the State of New York by John Torrey Vol

Sarsaparilla (Smilax ornata; top) was introduced to Europe in the 16th century by the Spaniards, first from Mexico and later from Honduras. Mexico, Central America and many parts of northern South America abound in various species of sarsaparilla, valued by the natives for their, more or less, medicinal qualities. The natives value its nourishing and healing qualities so much they would drive their cattle to areas where it grew in abundance in order to feed on the plants and receive its benefits.

Sassafras_albidum_-_Köhler–s_Medizinal-Pflanzen-260 

Sassafras (Sassafras albidum; top) was a well-known plant to the natives of the southwestern United States way before the Europeans came around. It had many purposes, including cooking (to flavor bear fat, to cure meat) and medicinal. The European interest in sassafras brought Europeans into closer contact with the Native Americans during the early years of settlement in 16th and 17th century Florida, Virginia and parts of the Northeast. Early European settlers enjoyed the aromatic scent of sassafras – according to legend, Christopher Columbus finally found land because he could smell the sassafras! As early as the 1560s, French visitors to North America discovered the medicinal qualities of sassafras, as well as the Spanish who arrived in Florida.

Sassafras trees were reported as plentiful at the arrival of the English on the coast of Northeast. Sassafras bark was sold in England and in continental Europe where it was made into a dark beverage called ‘saloop’ – touted to have medicinal qualities and used as a medicinal cure for a variety of ailments. This refreshing beverage was sold in place of tea and coffee, which were much more expensive, and was served in a similar way with milk and sugar. Sir Francis Drake was one of the earliest to bring sassafras to England in 1586, and Sir Walter Raleigh was the first to commercially export sassafras in 1602. Since the bark was the most commercially valued part of the sassafras plant due to large concentrations of the aromatic safrole oil, the trees would be stripped of their bark  – which kills the tree. This meant that as significant amounts of sassafras bark were harvested, supplies quickly diminished and sassafras became more difficult to find. For example, while one of the first shipments of sassafras in 1602 weighed as much as a ton, by 1626, the English colonists failed to meet their 30-pound quota. Unfortunately, over-harvesting is not a modern thing either.

Martin Pring; in his own words (1603):
“In all these places we found no people, but signes of fires where they had beene. Howbeit we beheld very goodly Groves and Woods replenished with tall Okes, Beeches, Pine-trees, Firre-trees, Hasels, Wich-hasels and Maples. We saw here also sundry sorts of Beasts, as Stags, Deere, Beares, Wolves, Foxes, Lusernes, and Dogges with sharpe noses. But meeting with no Sassafras, we left these places with all the foresaid Ilands, shaping our course for Savage Rocke discovered the yeere before by Captaine Gosnold, where going upon the Mayne we found people, with whom we had no long conversation, because here also we could find no Sassafras. De-parting hence 3 we bare into that great Gulfe which Captaine Gosnold over-shot the yeere before, coasting and finding people on the North side thereof. […] Bancroft, following Belknap, identifies Whitson’s Bay with the harbor of Edgartown, Martha’s Vineyard, which is in the latitude of 41° 25g. […]and finding a pleasant Hill thereunto adjoyning, we called it Mount Aldworth, for Master Robert Aldworths sake a chiefe furtherer of the Voyage, as well with his Purse as with his travell. Here we had sufficient quantitie of Sassafras.”

Is root beer period plausible?

What this rather long introduction means is that both main root beer flavors – sarsaparilla and sassafras – were known in 16th century Europe, and at least sassafras was used in a drinkable medicinal concoction in Europe. Unfortunately, it was not (yet) fermented… The tradition of brewing, or fermenting, root beer is thought to have evolved out of other European small beer traditions that produced fermented drinks with very low alcohol content. These were thought to be healthier to drink than possibly tainted local sources of drinking water, and enhanced by the medicinal and nutritional qualities of the ingredients used. For instance, the 14th century recipe Tizanne Doulce (like a tisane, or infusion) uses barley, licorice root and crystal sugar to make a root beer-like beverage.

Le Ménagier de Paris, 1393
TIZANNE DOULCE. Take water and boil it, then for each sester [the sester of 8 pints] of water put in a bowl heaped with barley, and it matters not if it be hulls and all, and two parisis [2 1/2d.] worth of liquorice, item, figs, and let it be boiled till the barley bursts; then let it be strained through two or three pieces of linen, and in each goblet put great plenty of crystallised sugar. Then the barley is good to give to poultry to eat to fatten them. Note that the good liquorice is the newest and it is a fresh greenish colour, and the old is more faded and dead and is dry.


Roots, bark, resin, fruits & flowers

We chose these specific roots, barks and leaves as these either grew in the back yard (our property adjoins a New York State Protected Wetland, so plenty of bio-diversity) or we already had in the kitchen cupboards. Even though I met someone via Facebook who lived in the South and had a sassafras tree in his backyard and was willing to ship rootstock, unfortunately, facebook ate the conversation and he was never heard from again… so this time around, at least, no period-correct Southern grown sassafras. We substituted with black birch, as that has a root beer typical wintergreen-like flavor, and spicebush (bottom).

Spicebush or Lindera Benzoin.  Wm PC Barton. 

We went on a scavenger hunt and gathered as much as we could from the back yard and surrounding property. Ironically, it is in our modern middle Ages not possible to buy fresh, green licorice; therefor we’ll have to do with the ‘dead’ dry stuff. The kid made name cards to label each baggie of ingredients.
IMG_3799
Backyard scavenger hunt with friend.

Our recipe

  • 0.6 oz black birch bark
  • 0.6 oz spicebush bark
  • 0.3 oz licorice root
  • 0.3 oz dandelion root
  • 0.3 oz birch bark
  • 0.3 oz black cherry bark (included resin)
  • 0.3 oz juniper berries
  • 1 tbs hops flowers
  • 1 tbs ginger root
  • 1 cinnamon stick
  • 2 ½ quart water
  • 1 cup sugar (brown sugar)
  • yeast starter (ale yeast, reclaimed from a perry).


IMG_3839 

Then it was time to brew! The kids scraped the bark off the wintergreen and spicebush twigs. He chopped the dandelion root and grated the ginger root. He broke the birch bark, the cherry bark and the dried licorice root into little pieces. He picked the juniper berries from between the greens. And crushed the cinnamon stick. Mom got homegrown hops from the freezer (he’s not touching the hops supply). He measured everything on the scale, and added it all to the big sauce pot. He measured and added the 2 ½ quarts of water. Turned on the stove, and brought it up to a boil. When boiling, it was turned down to a simmer, to simmer for 20 minutes. When done, mom put the pot in the sink in cold water to cool. The infusion was left to sit overnight.

IMG_3900

The next day, he poured some reclaimed ale yeast into a 1 gallon carboy, and poured the infusion – through a filter – into the same carboy. He added 1 cup of sugar, for the yeast. He then shook the carboy well to dissolve all the sugar, and carefully poured the infusion into his recycled fliptop soda bottles. They were left in a warm place to start fermentation. They will stay out for a few days, until carbonation is visible, and then be refrigerated to stop/slow down the yeast.

A table showing the different botanicals that can be used in root-beer (X marks the ones we used):


Roots and herbs
Spices

Sassafras albidum – roots, leaves, bark
Pimenta dioica – allspice

Smilax ornata –sarsaparilla X Juniperus communis – juniper berries

Smilax glyciphylla – sweet sarsaparilla
Trigonella foenum-graecum – fenugreek

Piper auritum – root beer plant
Myroxylon balsamum – Tolu balsam
X Glycyrrhiza glabra – liquorice (root)
Abies balsamea – balsam fir

Aralia nudicaulis – wild sarsaparilla
Myristica fragrans – nutmeg

Gaultheria procumbens – wintergreen (leaves and berries) X Cinnamomum verum – cinnamon (bark)
X Betula lenta – sweet birch (sap/syraup/resin)
Cinnamomum aromaticum – cassia (bark)
X Betula nigra – black birch (sap/syrup/resin)
Syzygium aromaticum – clove
X Prunus serotina – black cherry
Foeniculum vulgare – fennel (seed)

Picea rubens – red spruce X Zingiber officinale – ginger (stem/rhizome)

Picea mariana – black spruce
Illicium verum – star anise

Picea sitchensis – Sitka spruce
Pimpinella anisum – anise

Arctium lappa – burdock (root) X Humulus lupulus – hops (bells/flowers)
X Taraxacum officinale – dandelion (root)
Mentha species – mint


Other ingredients


Hordeum vulgare – barley (malted)


Hypericum perforatum – St. John's wort

X Sugar


Molasses

X Yeast


Note: black birch and the evergreen Gaultheria are both sources for the scent wintergreen.
Note: while in medieval European brewing Juniperus communis was used, as we have several mature trees of Juniperus virginiana we used that instead. Like its European counterpart, Virginian juniper is also used to flavor gin.


Medieval European plausibility of our chosen ingredients: [yes / no]


black birch bark wh eastern North America no
spicebush bark wh eastern North America no
dandelion root wh native to Eurasia and North America yes
birch bark wh native to Eurasia and North America yes
black cherry bark wh eastern North America, Central America no
juniper berries hg native to Eurasia and North America yes
hops flowers hg introduced to northern Europe in the 9th century yes
licorice root cs native to southern Europe and parts of Asia yes
ginger root cs exported to EU via India in the first century AD yes
cinnamon stick cs exported to EU via Africa (Egypt) from Sri Lanka yes

Legenda – wh: wild harvested; hg: home grown; cs: commercially sourced


Observations

  • this is an excellent youth-adult project!
  • neither of us liked the licorice after-taste.
  • next time we intend to add burdock, and maybe some mint, or anise – the possibilities are endless!
  • only add a little bit of lees. There is plenty of yeast in even a little bit to start fermentation.
  • if using commercial dry (bread) yeast, a pinch to each bottle is enough.
  • as soon as vigorous carbonation is visible on the outside of the bottles, put them in the fridge.
  • just in case, have a large container ready when opening the flip-top to catch any overly-carbonated blow-out.
  • fermented root beer will go alcoholic eventually – keep an eye on the brew so the kids don’t get too frisky.
  • alcoholic root beer tastes quite good!

And as Sir Kenelme Digby so aptly advised, in his slightly post-period brewing cornucopia:
“You may use what Herbs or Roots you please, either for their tast or vertue…”


Sources

Wednesday, March 14, 2018

Goat's milk Farmstead Cheese, step by step.

 A brand new little one, still covered in caul. Mommy is giving him many kisses!
Born March 6th, 2018.

 With the spring babies born, but the ground still covered in snow, it was time to try my hand once again at the elusive challenge of hard cheese making. The first time I tried, about four years ago, I made three cheeses using the traditional cheddar process - a laborious and not all enjoyable experience. One tasted like feta, one like crumbly chevre, and the third tried to run away when cut... hubbie thought it the best cheese ever, a perfect stinky cheese! Then I met two Viking ladies making cheese the old fashioned Farmstead way and I thought: that actually looks do-able...

After a couple days of googling other farmstead cheese makers and chatting with my viking ladies I "put on my naughty shoes" (another Dutch saying, sadly lost in translation) and went to the store to buy some fresh local goats milk, and a quart of goat's yogurt. As I am cow dairy intolerant, my process did not include any cow dairy products which otherwise could be used to raise the yield of curds, like cream or powdered milk.


I heated my 2 gallons of milk to 185 degrees Fahrenheit in a well cleaned stainless pot.


The recipe then mentioned to add a mesophilic cheese culture. I used a gouda starter as I happened to have one in the freezer. I added half a teaspoon but I think that was overkill, a quarter probably is more than enough. I also added a teaspoon of calcium chloride to help the curds to form, and half a cup of yogurt to increase yield. If I would use same-day backyard milk neither the calcium chloride nor the yogurt would be necessary but as this was store bought milk I wanted to make sure I got a good yield.
I then covered the milk and let it ripen for 45 minutes.


I added a teaspoon of rennet, diluted in a quarter cup of water to the milk, and gently mixed it in with an up-and-down motion. When using cows milk the cream would have separated and floated to the top, in that case the recipe I followed said to top-stir for 1 minute no more than an inch deep to blend the butterfat back into the milk.
The pot was covered again and stood for another 45 minutes, making sure it stays at around 85F. Of course, I immediately forgot I had briefly turned on the stove to warm the pot back up a bit as the temperature had dropped to 82F. By the time I realized it was at 90F and I started to panic! Lucky for my my Viking buddy was on-line and assured me that in history people made cheese without thermometers perfectly fine, and not to worry the small stuff. And in retrospect the cheese turned out fine.


Yellowish liquid called whey collected at the top. When the solid curd broke cleanly it was time to cut the curds. Cut the curds with a long knife into one inch cubes. First cut front to back straight down, then side to side straight down, then diagonally up-and-down one way and diagonally up-and-down the other. This way most of the curds are cut into relatively small pieces.

Then I placed the pot in a sink filled with hot water. Slowly heat the pot to 100F, taking about 30 minutes to do so; or about 2 degrees every 5 minutes. Stir gently so the curds do not stick to each other and clump too much. As I started at around 90F my curds did not have as much temperature difference to cure and I did not think this step would amount to much. But it did, and after about half an hour at 100F the curds had noticeably shrunk down. Maybe not as much as they could have, but enough for what I needed.


The curds will slowly shrink in size and become more sturdy. The whey or liquid will be come more yellow from the curds shedding liquid.


I gently poured the whey and curds in a cheesecloth covered colander. I always collect my whey, it can be used for many things.


Gather the ends of the cheesecloth and hang above the colander (collect the whey) for about an hour in a draft free warm area.


With my hands I broke up the curds in small marble sized pieces. I added one tablespoon of iodine free sea salt to the dry curds and mixed it in well.


I use a large metal coffee can cylinder, without a top and a bottom, as a mold. A piece of pvc pipe could work as well, as long as it is clean and not rusty or scratched. Line the mold with cheesecloth and add the curds.


I pressed the curds down well, and gently folded the cheesecloth down flat over the top of the curds.


 Then I placed the mold in my cheese press with 10# of weight for 10 minutes. I made a cheese press out of 2x8's, galvanized pipes and dumbbell weights from the salvation army (at 25 cent per pound of weight!) - it is cheap and works surprisingly efficient. I am less enamored about the coffee tin, although while it might not work optimal, it does work well enough. I do not have drain holes in the tin can as I can not drill or poke from outside in - that would leave burrs on the inside - and I have not explored the challenge of poking or drilling from the inside out. I often make soft cheese molds out of empty butter containers and melt holes with a nail from the inside out - this makes for easy and very effective, and free!, molds.

I took the cheese out of the coffee mold, took off the cheese cloth, turned it upside down, wrapped it in cheesecloth again and placed it back in the mold. The second time the cheese is pressed at 20# for 10 minutes.


The third time I removed, flipped, redress and pressed the cheese at 50# for 12 hours.


I placed the mold on an upside down plate so the extra whey would drip onto the cookie sheet below. When designing your metal bar cheese press make sure the bars are tall enough to securely hold the 3 dumbbells in place when pressing at 50 pounds. This is also why I used a slightly oversized 2x8" as the wider the bottom the less likely it is going to tip over. If I would redo this press I would make the space in between the two bars about the same width as a small cookie sheet so it can sit on top of the wood base for an even sturdier structure, or add two feet to either end so the press shelf has enough space underneath to slide a cookie 'drip' sheet underneath.


Late that evening: the freshly pressed cheese straight from the cheesecloth... it smelled wonderful.


The cheese will need to sit and dry for about 3-5 days (depending on humidity). I happened to have some plastic grating so used that, bamboo placemats also works real well.


The cheese drying to the air. When it has formed a nice skin it will be slathered in lard to protect it from infection during curing. Olive oil or butter can also be used, as can cheese wax. Store the cheese in an air tight container - it will generate its own moisture - and store in a cool place like a cold storage, a root cellar, or a well house. This will keep foreign molds and other invaders from colonizing your brand new cheese while at the same time enjoying a nice cool and dark environment. Age the cheese for at least a month, and re-apply your oil/fat as needed. If small spots of mold appear remove the spots and redress. And make another one as once you eat your first you won't want to wait another month or more to try your next!

Based in part on information from:

Sunday, August 27, 2017

Processing Beeswax Comb

As part of making washed comb mead I of course now have much washed wax as well. Following is what I did to clean the wax so I could then use it to make something else (in this case, leather conditioning saddle soap!).


 The cappings from the uncapped honey comb, all washed and filtered out of the honey must.


I then gather a big handful and squeeze all the remnant liquid out, and form balls of the solid parts.


I also added the empty wax comb I scraped off my frames. As you can see there is an bovious difference in color between the (high quality) yellow wax cappings and the (low quality) brown empty brood comb.


Next the comb is heated to melt double boiler style. I have two pots which fit into each other, and fill the outside one with water which in turn heats and melts the wax in the inside pot. It is easy to scorch wax as it has a high melting point, and the double boiler method helps prevent this from happening (especially when easily distracted).


Most of the wax is now melted, apart from some yellow little bits. While slowly heating and melting I stirred the wax to make sure all parts get heated equally.


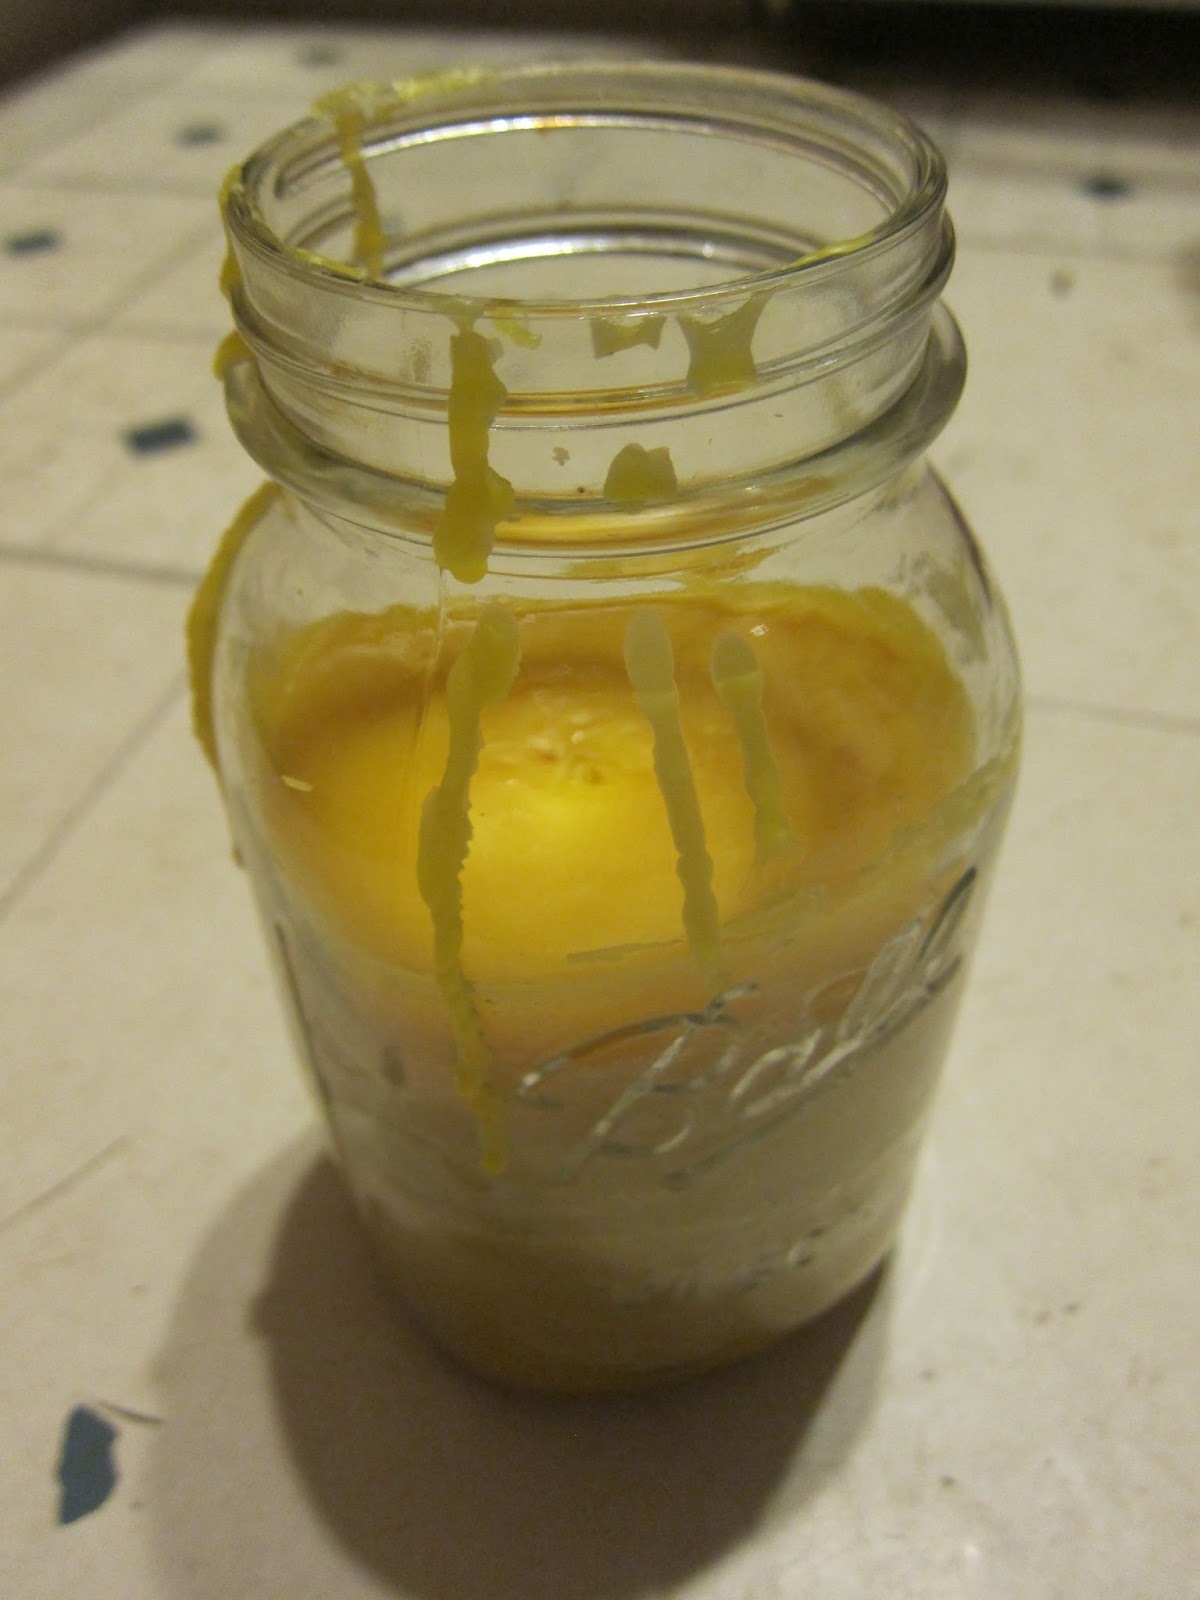
When all is melted - and there will be bits in there which are not wax and will not melt, like dead bees and slumgum - very slowly pour the hot wax through a coarse filter into a container. I like using  mason jars as they are heat resistant and can later also safely be used as a double boiler to melt again (and double as a useful storage jar). I found a coffee filter to be too fine to filter wax and know others use (salvation army) cotton sheets or cheese cloth to do so. As I have milking goats I have access to milk filters and found those to work well (cost about $8 for 100 at Tractor Supply). I used about 3 separate filters to fill this quart jar, and they will double as firestarters come winter. As I do not enjoy scrubbing solidified wax off my funnels I did not use a funnel to support the filter. As long as I am careful not to pour too fast, once it is filled it will stay up on it's own and not need support.


I also make sure to pour slowly so the slumgum in the back of the pot does not slide forward into the small filter. Slumgum is the residue of rendering beeswax as brood comb beeswax contains not only wax but also the pupal lining, pollen and other residual debris. Rendering cappings or honey comb wax creates less slumgum, and more wax, making it more valuable. Of course, this slumgum is not a waste product in my household either! Add some sawdust (about half and half), mix well and fill emtpy cardboard egg containers: and voila! more firestarters (use one 'egg' at a time).


The finished product, worth it's weight in gold: buttery looking beeswax!
It is already mostly used up to make saddle soap, and man, does it make nice leather conditioner...