Wednesday, March 14, 2018

Making Chevre, or fresh soft goat cheese; day two

Soft Cheese making, day 2:
- sterilize cheese cloth by pouring boiling water over it.


- take pot with cultured milk out of warming box (oven)
- the whey will have separated from the curds, which with this cheese looks like a large white pancake floating in watery greenish liquid.


- suspend a colander in/on a stockpot and line with the cheesecloth. 


- pour the whey off through the cheesecloth, and you'll be left with a spongy cheese mass in the pot.
- carefully dump the cheese into the cheesecloth, as not to spill any around the edges.


- tie the four corners of the cheesecloth together, to make two loops
- hang the cheesecloth by the two loops with a hook off a door handle or something similar


- let gravity drip out excess liquid (whey)


I stop when it only drips occasionally.


If you mix it with a standmixer it will become like a cream cheese.
If you add herbs and salt while packing it into a mold, it makes a great herbed cheese (no mold? poke holes inside out with hot nail in small butter tub) - dill makes a good one, as does nettle.
If you mix in honey it makes marvelous honeyed chevre (honey also helps it keep longer).
If you keep it on the wet side, you can use it as a "kwark" substitute to make European sweet cheesecake.

It freezes well.

Making Chevre, or fresh soft goat cheese; day one

Several times for dayboard I have made fresh goat's milk cheese. For people not familiar with this insanely easy way of making goat cheese, here is my modern method.

- Heat the goat milk to circa 90 degrees F (or use body warm raw milk straight from the source, my preference).


 - measure out 1/8 tsp of culture (I use MM100) per gallon


- add 1 drop of rennet (for up to 5 gallons I think). I use rennet made from calf's stomach; it is also available made from a vegetable source.


- whisk calmly all around and up and down to incorporate culture & rennet


- put in oven, turned off but with (pilot) light on. This makes a perfect insulated box.


- wait until the next morning...

Ricotta from fresh goat's milk whey

The fresher whey, the more fresh cheese! Whey is the by-product of making cheese and cheese makers often have so much they do not know what to do with it... I have experimented with norse lemonade (whey with concentrated fruit juice - actually not bad and rather thirst lessening), used it to make soap (appropriately titled 'Whey Cool') and have fed it to the chickens, goats and pigs. But this time was different, this time I was going to take the challenge and transform this often deemed waste product into even more cheese! I made my first batch of ricotta with whey from cheese of the day before, but now I know how easy the process is next time I will make it straight from the cheese pot.

The whey needs to be heated with agitation to 160° F. If available, 5-12% in volume of fresh milk can be added to improve yield and richness of the ricotta. As I had used all my milk to make hard cheese, I did not add anything extra.


Continue heating to 170° F. When it reaches temperature add 1/2 tsp. of salt per gallon of liquid and mix it in quickly. Continue to heat, without agitation, to 185° F and hold at this temp "until the ricotta rises." I am not sure what is meant with the latter part of the sentence. While a foamy scum did form on the surface of the whey, akin to butterfat, the actual cheese would sink to the bottom upon solidifying (like regular cheese curds). It is OK if the whey heats well into the 190° F, in the past people heated to just below boiling but this is not necessary.


When the whey has as at 185° F and a foamy scum has formed on top, mix in 1/2 tsp. of citric acid, dissolved in 1/2 cup water, per gallon of liquid. Add this quickly to the whey and stir briskly for 5-10 seconds. The acid will form small flaky curds which hopefully gradually form larger curd masses. If nothing much happens, add some more citric acid solution.


According to the recipe: "if too much acid is added, the curds will sink to the bottom and the cheese will not be sweet. The correct amount of acid will produce a clear separation of white curds and bright green whey. Use a perforated stainless steel ladle to gently move the curds from the sides to the center of the pot. These clumps of curd will begin to consolidate floating on top of the liquid. Let the curds rest for 10-15 min. This is very important because this is the point where the final Ricotta quality is assured. Ladle the curds gently into draining forms (No cheese cloth should be needed if you were patient in the previous step). Let the curds drain for 15 min up to several hours."


According to my experience, although the whey had not cleanly separated yet (much more yellow then green) and I used the exact amount of citric acid as indicated I never found my cheese curds wanting to float. The cheese curds were small and fluffy, like snowflakes, and the cheese tasted similar to chevre (fresh goats cheese). Now I know this technique I will experiment, it is likely there just was not that much solids left in the whey for the amount of citric acid, or goat whey behaves slightly different from cow whey.


I drained my ricotta with cheesecloth until it stopped dripping and ladled the curd into small cheese molds.


The molds are then placed in a cheese box (closed plastic container with bottom grid to keep the molds out of the shedded whey) in the refrigerator. The ricotta can also be drained for several ours for a denser and richer consistency. Consume the fresh cheese within 10 days.

The fresh cheese molds I use I make out of butter containers: they are made from a food safe plastic and come with a fitting lid. The holes are made by heating a finishing nail (held with pliers) in the flame of a gas stove (or butane lighter) until red hot, and then melting this hot nail from INSIDE out through the wall of the container. The holes have to be made from inside out as that way any burrs of melted bits of plastic are on the outside and do not hinder the cheese.


The full Ricotta instructions are found at:
http://www.cheesemaking.com/store/pg/217-Ricotta.html

Goat's milk Farmstead Cheese, step by step.

 A brand new little one, still covered in caul. Mommy is giving him many kisses!
Born March 6th, 2018.

 With the spring babies born, but the ground still covered in snow, it was time to try my hand once again at the elusive challenge of hard cheese making. The first time I tried, about four years ago, I made three cheeses using the traditional cheddar process - a laborious and not all enjoyable experience. One tasted like feta, one like crumbly chevre, and the third tried to run away when cut... hubbie thought it the best cheese ever, a perfect stinky cheese! Then I met two Viking ladies making cheese the old fashioned Farmstead way and I thought: that actually looks do-able...

After a couple days of googling other farmstead cheese makers and chatting with my viking ladies I "put on my naughty shoes" (another Dutch saying, sadly lost in translation) and went to the store to buy some fresh local goats milk, and a quart of goat's yogurt. As I am cow dairy intolerant, my process did not include any cow dairy products which otherwise could be used to raise the yield of curds, like cream or powdered milk.


I heated my 2 gallons of milk to 185 degrees Fahrenheit in a well cleaned stainless pot.


The recipe then mentioned to add a mesophilic cheese culture. I used a gouda starter as I happened to have one in the freezer. I added half a teaspoon but I think that was overkill, a quarter probably is more than enough. I also added a teaspoon of calcium chloride to help the curds to form, and half a cup of yogurt to increase yield. If I would use same-day backyard milk neither the calcium chloride nor the yogurt would be necessary but as this was store bought milk I wanted to make sure I got a good yield.
I then covered the milk and let it ripen for 45 minutes.


I added a teaspoon of rennet, diluted in a quarter cup of water to the milk, and gently mixed it in with an up-and-down motion. When using cows milk the cream would have separated and floated to the top, in that case the recipe I followed said to top-stir for 1 minute no more than an inch deep to blend the butterfat back into the milk.
The pot was covered again and stood for another 45 minutes, making sure it stays at around 85F. Of course, I immediately forgot I had briefly turned on the stove to warm the pot back up a bit as the temperature had dropped to 82F. By the time I realized it was at 90F and I started to panic! Lucky for my my Viking buddy was on-line and assured me that in history people made cheese without thermometers perfectly fine, and not to worry the small stuff. And in retrospect the cheese turned out fine.


Yellowish liquid called whey collected at the top. When the solid curd broke cleanly it was time to cut the curds. Cut the curds with a long knife into one inch cubes. First cut front to back straight down, then side to side straight down, then diagonally up-and-down one way and diagonally up-and-down the other. This way most of the curds are cut into relatively small pieces.

Then I placed the pot in a sink filled with hot water. Slowly heat the pot to 100F, taking about 30 minutes to do so; or about 2 degrees every 5 minutes. Stir gently so the curds do not stick to each other and clump too much. As I started at around 90F my curds did not have as much temperature difference to cure and I did not think this step would amount to much. But it did, and after about half an hour at 100F the curds had noticeably shrunk down. Maybe not as much as they could have, but enough for what I needed.


The curds will slowly shrink in size and become more sturdy. The whey or liquid will be come more yellow from the curds shedding liquid.


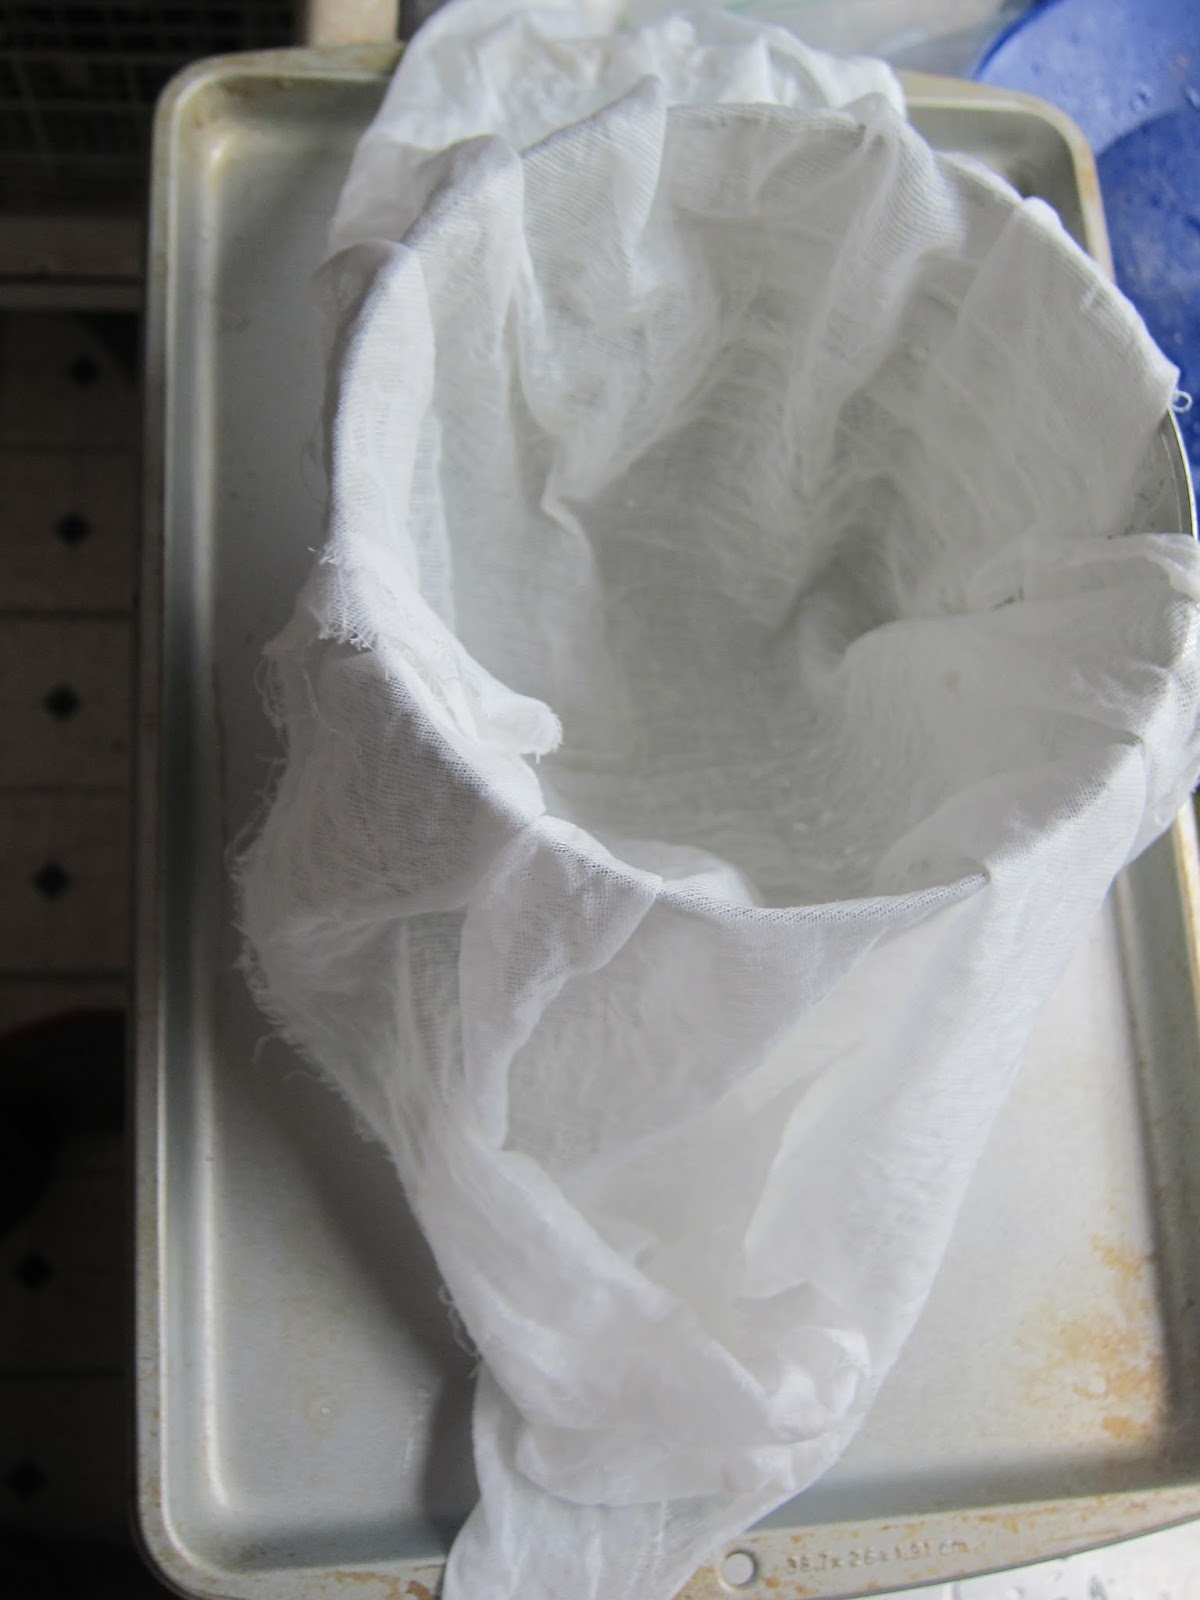
I gently poured the whey and curds in a cheesecloth covered colander. I always collect my whey, it can be used for many things.


Gather the ends of the cheesecloth and hang above the colander (collect the whey) for about an hour in a draft free warm area.


With my hands I broke up the curds in small marble sized pieces. I added one tablespoon of iodine free sea salt to the dry curds and mixed it in well.


I use a large metal coffee can cylinder, without a top and a bottom, as a mold. A piece of pvc pipe could work as well, as long as it is clean and not rusty or scratched. Line the mold with cheesecloth and add the curds.


I pressed the curds down well, and gently folded the cheesecloth down flat over the top of the curds.


 Then I placed the mold in my cheese press with 10# of weight for 10 minutes. I made a cheese press out of 2x8's, galvanized pipes and dumbbell weights from the salvation army (at 25 cent per pound of weight!) - it is cheap and works surprisingly efficient. I am less enamored about the coffee tin, although while it might not work optimal, it does work well enough. I do not have drain holes in the tin can as I can not drill or poke from outside in - that would leave burrs on the inside - and I have not explored the challenge of poking or drilling from the inside out. I often make soft cheese molds out of empty butter containers and melt holes with a nail from the inside out - this makes for easy and very effective, and free!, molds.

I took the cheese out of the coffee mold, took off the cheese cloth, turned it upside down, wrapped it in cheesecloth again and placed it back in the mold. The second time the cheese is pressed at 20# for 10 minutes.


The third time I removed, flipped, redress and pressed the cheese at 50# for 12 hours.


I placed the mold on an upside down plate so the extra whey would drip onto the cookie sheet below. When designing your metal bar cheese press make sure the bars are tall enough to securely hold the 3 dumbbells in place when pressing at 50 pounds. This is also why I used a slightly oversized 2x8" as the wider the bottom the less likely it is going to tip over. If I would redo this press I would make the space in between the two bars about the same width as a small cookie sheet so it can sit on top of the wood base for an even sturdier structure, or add two feet to either end so the press shelf has enough space underneath to slide a cookie 'drip' sheet underneath.


Late that evening: the freshly pressed cheese straight from the cheesecloth... it smelled wonderful.


The cheese will need to sit and dry for about 3-5 days (depending on humidity). I happened to have some plastic grating so used that, bamboo placemats also works real well.


The cheese drying to the air. When it has formed a nice skin it will be slathered in lard to protect it from infection during curing. Olive oil or butter can also be used, as can cheese wax. Store the cheese in an air tight container - it will generate its own moisture - and store in a cool place like a cold storage, a root cellar, or a well house. This will keep foreign molds and other invaders from colonizing your brand new cheese while at the same time enjoying a nice cool and dark environment. Age the cheese for at least a month, and re-apply your oil/fat as needed. If small spots of mold appear remove the spots and redress. And make another one as once you eat your first you won't want to wait another month or more to try your next!

Based in part on information from:

Thursday, March 1, 2018

Medieval Ale & Beer - primary sources for reenactors.


This manual happened by request, and is meant to help assist medieval enthusiasts, experimental archaeologists, re-enactors and anyone else interested in recreating historic ales and beers. It is a collection of bits and pieces published by many authors of the past on the brewing of beer – now conveniently gathered in one place – and it is meant to guide the modern brewer in making the best guesses possible for his or her historic brew. Much of the information available on brewing is from the 16th century, after the invention of printing press. Not all that unexpected, the first books specializing in beer and brewing appeared in Latin, the language of academics, and German, the language of a prolific brewing culture. While I will make an effort to include all books on brewing known to me, whether they are accessible to the English brewer or not, as I am neither fluent in Latin, nor in medieval German, I only have some tantalizing bits and pieces of foreign language information to share – for now.
       As the process of brewing did not change all that much until the industrialization of the early 19th century, I opted to include titles of books published up until 1800 to use as comparison with the older information.

If you know of a book, a manuscript, a recipe, a publication which helped you in your historic brewing, but you do not see it here, please contact me to have it included in the next revision. Depending on new finds and research this manual will be regularly updated.

To download Medieval Ale & Beer:
https://www.academia.edu/36051244/Medieval_Ale_and_Beer

The Wardrobe Project for their Royal Majesties - Team Norse / Viking.

The Norse outfits of Their Royal Majesties came together around one garment, a klappenrock for His Majesty. Starting with the coat we then searched for other extant finds of a similar time frame and culture to assemble a wardrobe. The different aspects of the wardrobe were divided up between 10 people, with each participant working on a part of their choosing. The color choice for the Royal Wardrobe is a mix between Their Majesty’s heraldic colors of black & red and the Kingdom heraldry of red & white. Where appropriate, the garments are embellished with silk trim, silk cord or silk tablet woven trim. Part of the fabric came from personal supply; part was bought especially for this project.


The base outfits of Their Majesties are based on extant garment pieces found in 10th century Danish Haithabu and Swedish Birka. Both towns were important trading villages of the time, creating exposure to a more diverse culture. His Majesty’s coat is based on garment pieces found in Haithabu that are interpreted as a wrap-around caftan, or klappenrock. His pants are based on earlier period Thorsberg Trousers (without the feet). Her Majesty’s coat is based on a pattern commonly known as the Birka coat.

Her apron dress is based on fabric fragments finds from Haithabu with its top adorned with a tablet woven brocade inspired by Birka finds. The under and overtunics are extrapolated from fabric fragment finds from both towns. The hoods are based on the well-known 11th century Skjoldehamn find. Unlike the unadorned extant piece, we added 10th century Mammen style embroidery on silk trim to add a bit of Royal flair.

For the Royal accessories we based the Knight’s white belt and belt pouch on Birka hardware finds. We choose a braided belt for Her Majesty in our Kingdom colors, as there is nearly no evidence for leather belts worn by Norse women. This belt is also based on the 11th century Skjoldehamn find and is thought to have belonged to a Norwegian woman. As Her Majesty would not have a belt pouch, a Haithabu style wood handled bag was made, boldly emblazoned with the Æthelmearc escarbuncle. The beads used in Her Majesty’s brooch string and necklace are based on 8th century Ribe exemplars. Their Majesty’s feet were covered with turnsole shoes based on 10th century shoes from Dorestadt, the Netherlands, another Viking trade center.

It was an amazing experience to see first how the wardrobe idea came together, then was taken apart and divvied up between the participants, to at the end come together again in its final assembly. While this type of collaboration is par for the course in medieval life, it is rare to encounter it in a SCAdian context. I feel privileged to have been part of this wonderful experience and hope the future will see more of this kind of multi-disciplinary, multi-artisan projects!

To download the documentation for this project, please visit:
https://www.academia.edu/35987087/The_Wardrobe_Project_-_a_set_of_Norse_Viking_Clothing_for_Their_Majesties