Technical Data on the Extant Piece:
Date: ca.
1250–1350
Geography: Made
in Scarborough, England
Culture: British
Medium: Earthenware,
green glaze
Dimensions: Overall:
9 7/16 x 11 1/2 x 5 1/4 in. (23.9 x 29.2 x 13.3 cm)
Classification: Ceramics
Credit Line: The
Cloisters Collection, 2007 at the Metropolitan
Museum of Art, NYC.
Accession Number:
2007.142
This pottery aquamanile is a rare survivor and preserves
some of its original green glaze.
Technical Data on my piece:
Date: the 27th
of July, 2016 (started June 30th)
Place of Origin: Aethelmearc
(NY, Ithaca basement)
Medium: Red earthenware
(WC614); blue (outside) & white (inside & horns) glaze
Dimensions: 7.5 x 7.5 x 3 in.
Throw two pieces on a wheel; for the ram this would be a
pitcher shape and a cylinder. Wrap loosely in plastic (damp cloth) and let dry
to leather hard overnight.

Line up the cylinder (part 1) with the belly (part 2)of the pitcher, inscribe the edge and cut out the inside piece.Score and cover the edges with slip (diluted clay which functions as glue), press well together, and sculpt into one piece.

Carefully roll legs, measure and attach to body suing the score and slip glue method. I added a small roll of clay at the base of the legs to widen the base as is seen in the original.

Throw a tiny vase (part 3, a bud vase) of the shape of the
head. Measure and mark the neck of the pitcher onto the belly of the bud vase,
mark and cut away. Use the score and glue method to clay them together at the
correct angle for the head. The neck of the bud vase will become the water
spout or mouth of the aquamanile.

Then throw only a neck (part 4), detach of clay clump on wheel, measure, cut out, and score & glue on back of ram in the shoulder area.

Then hand-pull a handle (I do not have an extruder) and
attach the handle from butt to filling spout. I used bits of dry clay in
between to shape it into a nice curve until it dried stiff. I also added
decorative grooves all around the body.
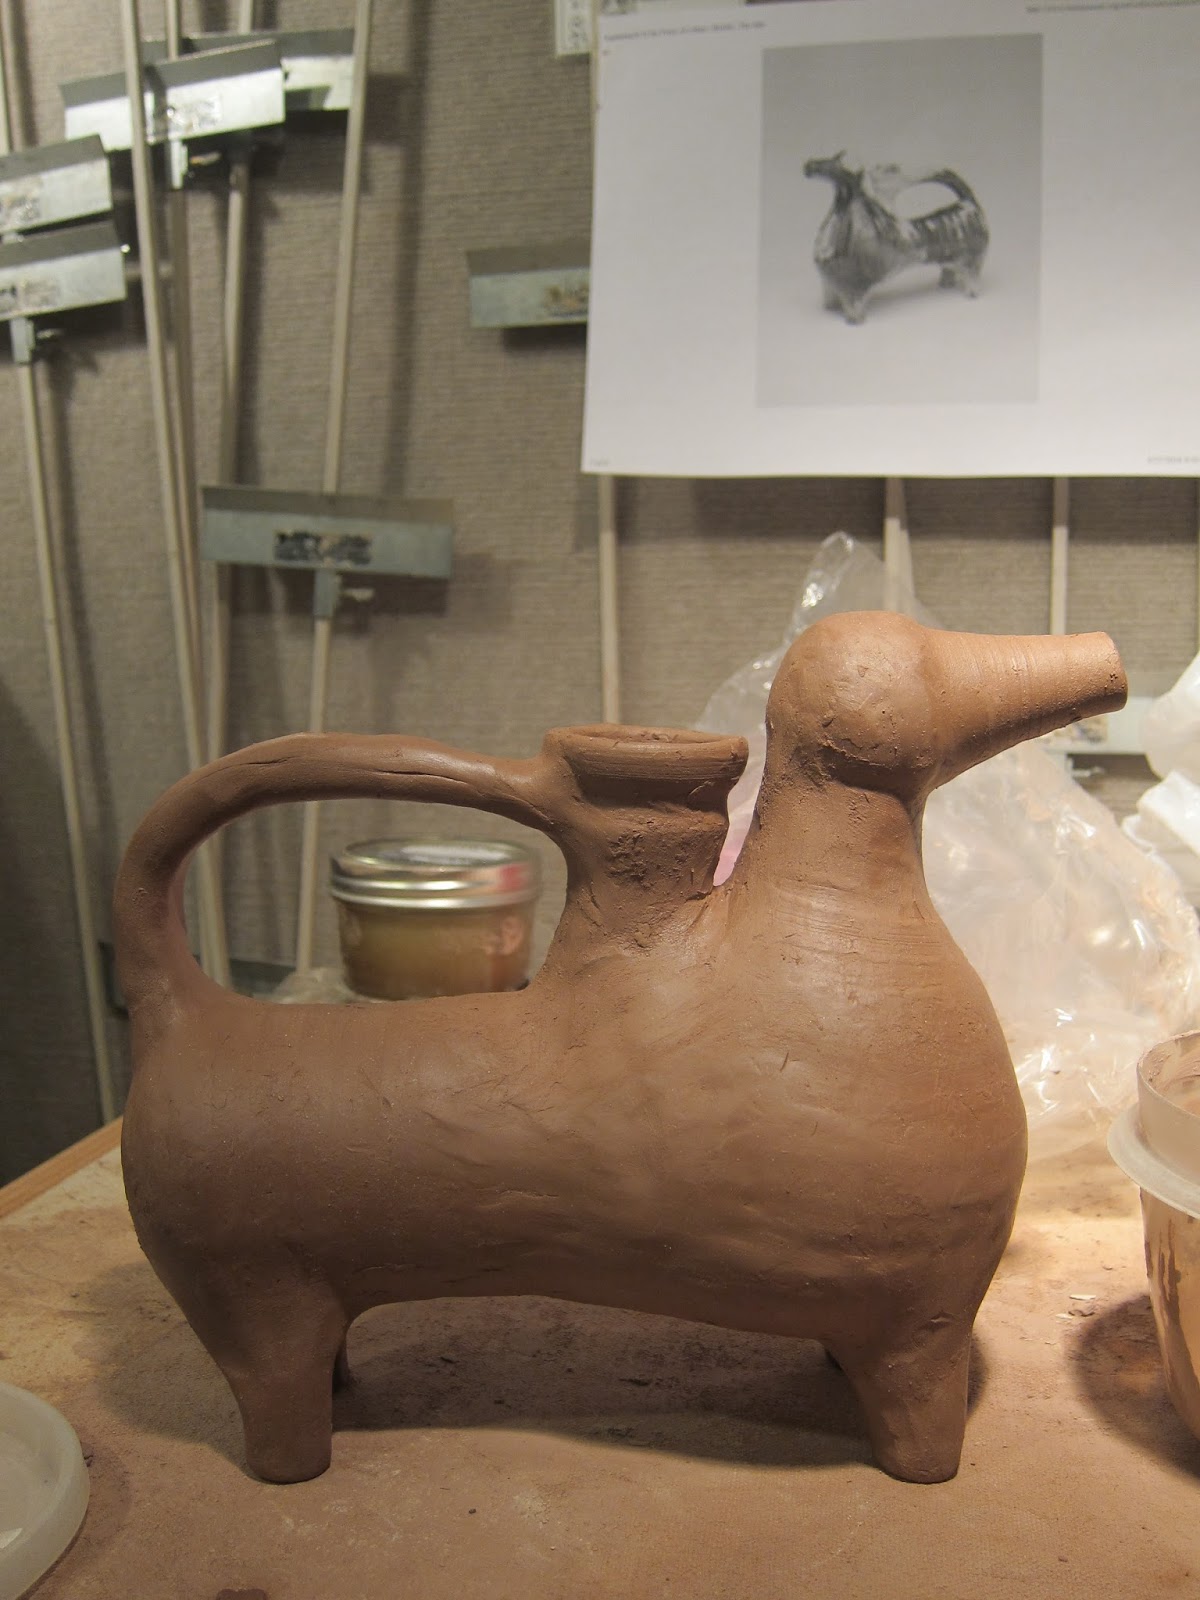
And as a finishing touch: add horns.

The original lost it’s horns, but from the lack of glaze it’s clear horns were there but broken off at some point in time.
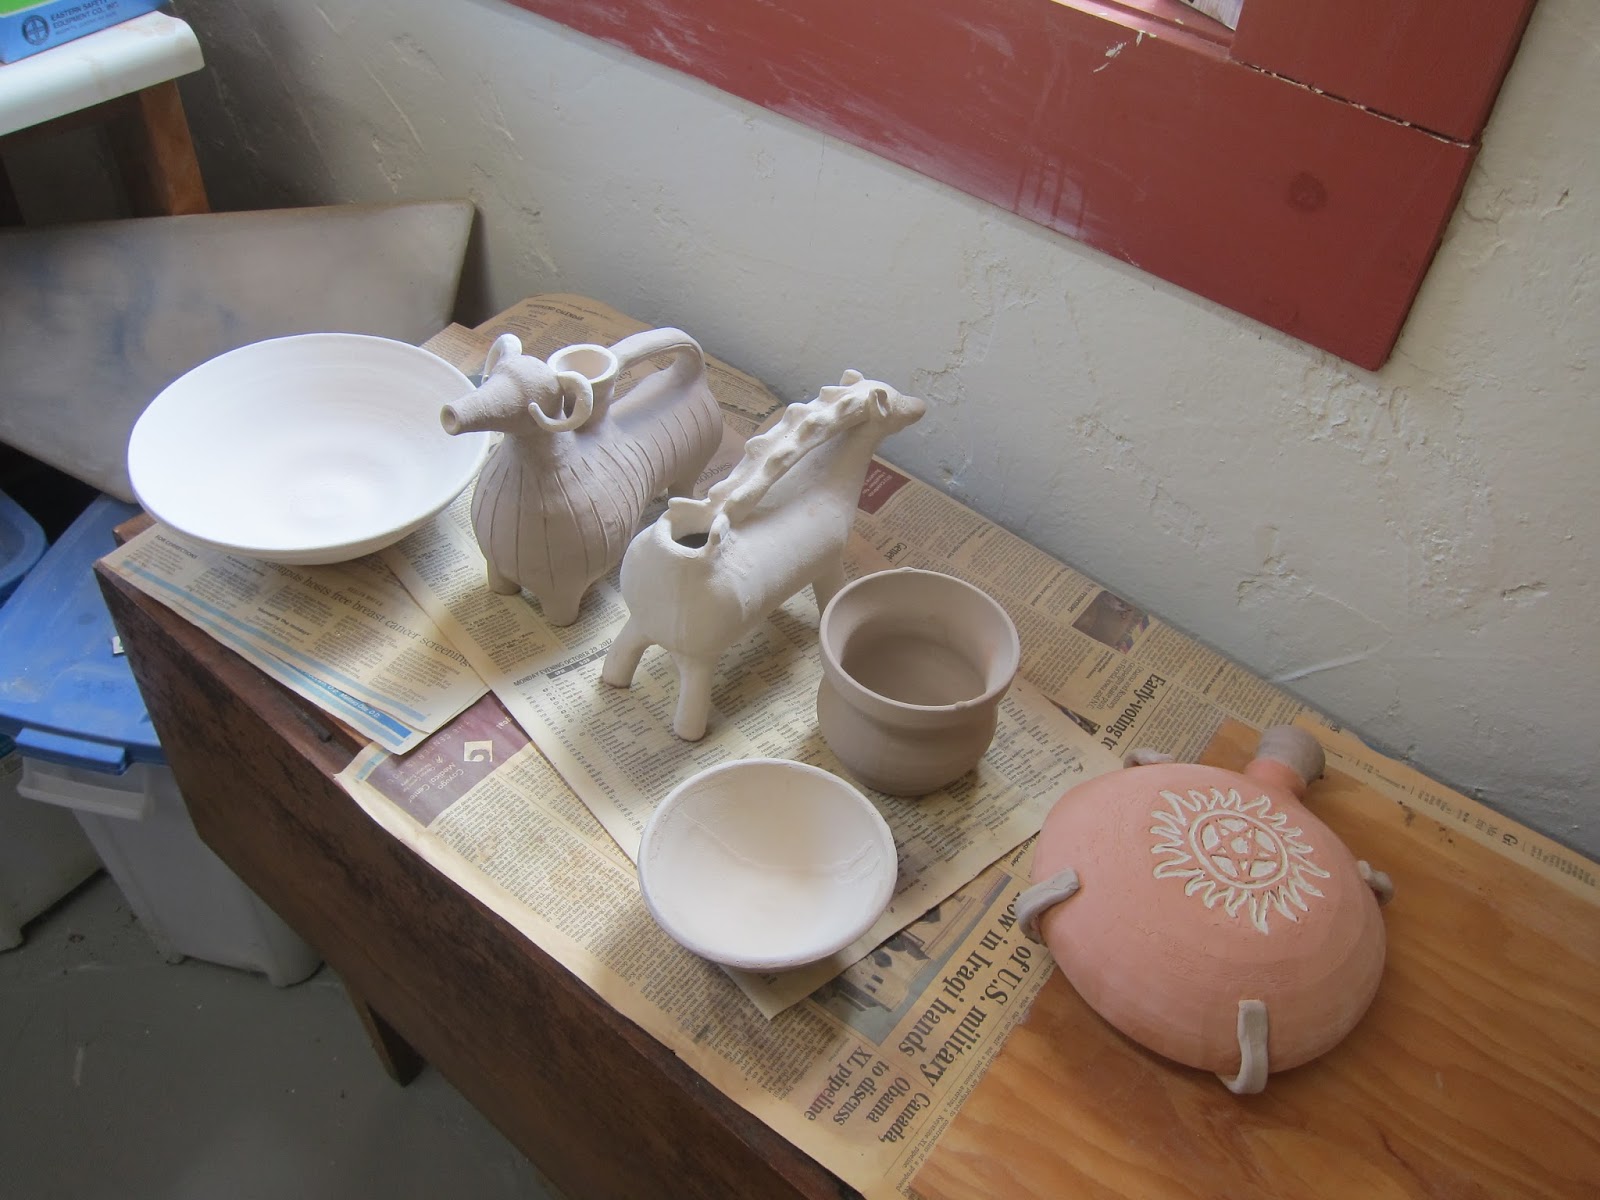
Now it is time to dry. Wrap the thin part like the head and
spout better than the thicker parts like the body so it dries pretty evenly.

When carefully dried, the clay ram is bisque fired. Clay is
fired twice, once to harden and another time at a higher temperature to melt
the glaze. After bisqueing the ram was dipped in glaze (looks like watery mud).
As I have to use the same glazes as the owner of the kiln (so we can share
firing without having chemical or temperature issues) and she does not use
green, I could not glaze the ram green like the original.
The extant piece as
photographed at the MET.

I went to see the Medieval collection at the Cloisters of the Metropolitan Museum this Christmas and to my happy surprise found this aquamanile on display. It was very rewarding to see it life after having trying to emulate it shapes. As I only had one view to work from, it was wonderful to photograph it from all sides and was happy to find my interpretation is pretty close. Except for size, it’s huge at about twice as big!

. : The finished piece : .
Bibliography
Heise, Jennifer (2007)
Hygiene of the Middle Ages and Rennaissance, Volume One: Personal
Grooming
The Compleat Anachronist #136
Metropolitan
Museum of Art (MET): Medieval
Aquamanilia
http://www.metmuseum.org/toah/hd/aqua/hd_aqua.htm
Metropolitan Museum of Art (MET): Ram aquamanile
http://www.metmuseum.org/art/collection/search/477815
St. Thomas
Guild: Medieval Table Manners.
http://thomasguild.blogspot.com/2013_10_01_archive.html
No comments:
Post a Comment