Affordable, but oh-so-easy to make yourself, charcoal drawing sticks
might very well have been one of the first art supplies available to
man. As all that is needed to make some is a low oxygen burn, and as we
have seen time and again with our son, it only takes a kid playing near a
cooking fire and another graffiti artist is born!
The science behind making charcoal, or charring, is interesting yet
surprisingly simple, and revolves around oxygen. Charcoal is formed by
the incomplete burn, or combustion, of wood. Composed of mostly
cellulose (CH
2O), wood does not burn immediately; first it releases steam (H
2O)
and turns from white to black. It chars, thus becoming charcoal (C, or
the element carbon, with trace minerals). When charcoal burns in contact
with air, carbon combines with oxygen to form the gas carbon dioxide (C
+ O
2 => CO
2) and lots of heat. The white ash
leftover from burning charcoal is what remains of the small amount of
non-flammable minerals which were present in the wood from the start
(and can be used to make lye).
When wood is burned without oxygen (this is called anaerobic), it
turns black as the water is evaporated out and charcoal is left behind.
If access to air is limited and heat is removed, the charcoal will
become stable and available for future use. Charcoal takes up less space
and is able reach a higher temperatures with the addition of extra air
(bellows) than a pile of wood, which makes it ideal for use in a
smithy’s furnace. To make proper charcoal an anaerobic burn is
necessary, and in history people have found different ways of doing so,
mostly by either digging in wood in hill sides or covering wood with a
burn resistant material (like a metal kettle) while building a large
fire right over it.
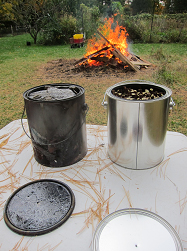
Previously used and new paint cans ready for heating.
All kinds of woody twigs can be made into charcoal and by varying the
types of trees the twigs come from you can make sticks of varying
densities and hardness. To make the type of charcoal sold in art stores,
traditionally grape vine or willow twigs are used. Add a small charcoal
kiln, and a nice big bonfire, and voila! charcoal sticks!
Any kind of metal can with a tight fitting lid can be used as a
charcoal kiln. I prefer to use a new paint can from a home improvement
store as it has lots of room, a handle, and minimal chemical residue. It
does have a liner and same as with yard sale tins it is a good idea to
dry burn it first, not only to remove any leftover residue but also to
see if the tin is strong enough to survive the temperatures of a good
fire without melting or warping! Lastly, your kiln needs an air hole – a
vent – in the lid; a finishing nail hammered through the center works
perfectly.
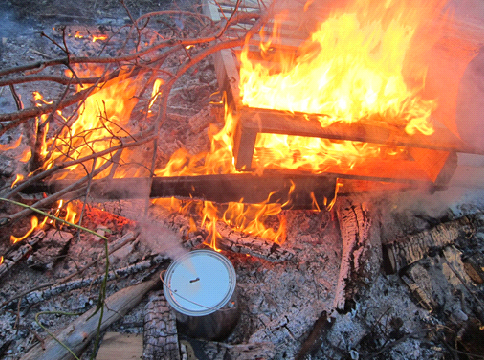
Bonfire ready to go, kiln steadily venting steam.
Next up is the hunt for some good sticks and twigs. Keep in mind that
charcoal shrinks significantly so don’t get real skinny ones. Wild
grapes are easily found along roadsides and forest edges; willow likes
to grow in ditches and near water. The bark can be removed beforehand,
or left on to be removed later as needed. Fill the kiln as full as you
can, making them as long as you can while still being able to close the
lid. Hammer the lid on well, its purpose is to keep oxygen from entering
the kiln chamber. It’s fine to mix types of wood and various diameters,
and that way you’ll get a nice mix of drawing sticks to play with too!
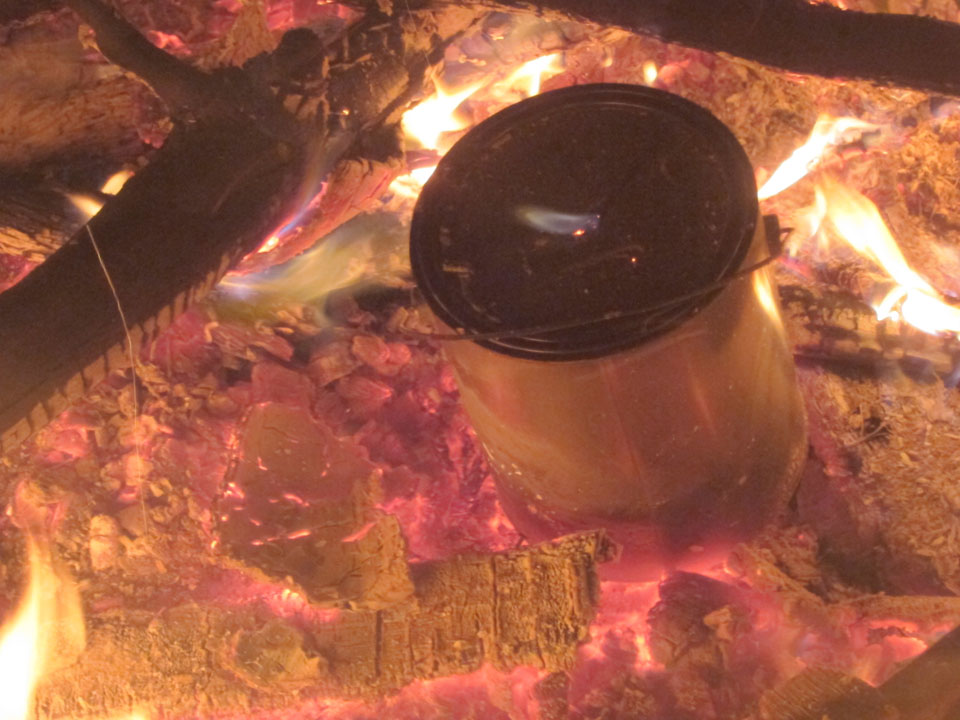
Combustible gasses are being burnt off.
And now it’s time to play with fire. Make a good wood fire with lots
of coal and with a long stick place your cans in or near the fire.
Depending on the amount of water in the wood. after a bit steam will
come out of the vent enthusiastically. If the steam comes out
forcefully, looking like a pillar, pressure is building up inside which
can blow off the lid. Either scoot the can over away from the heat a
little, or wire the lid down, and try again. If you feel like it should
be steaming but suddenly is not, the hole might be plugged with liquid
tree sugars – fish the kiln out of the fire, use the nail to poke open
(and slightly enlarge) the hole, and try again.
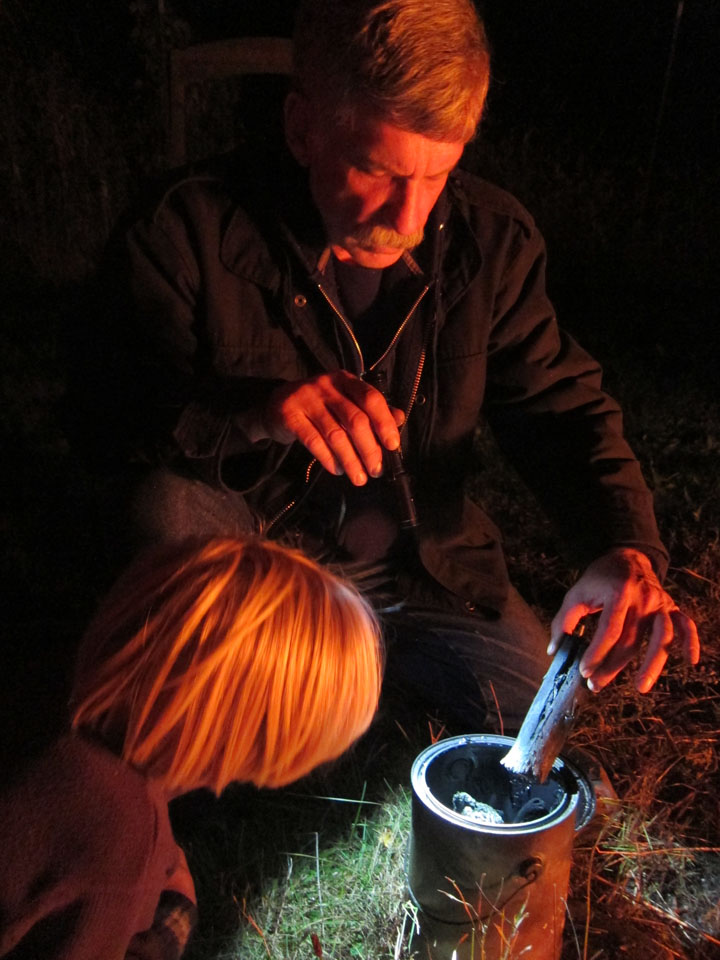
Closing off the air hole during cool down.
Heat the kiln well for at least an hour if it is directly in the
fire, or a couple of hours if at the sideline. As long as steam is
coming out no air can come in, and the charcoal is doing fine. If the
lid blows off, replace is as soon as you can, and take another drink… At
the end of the burn, when all water is evaporated, the combustible
gasses are ready to go. The steam will dwindle away and suddenly a
candle flame will spout out of the lid hole! When the flame also
dwindles away, carefully take the kiln out of the fire, immediately plug
the air hole and let it cool down completely.
Admiring the charcoal – it’s like a magic trick!
When the kiln has cooled down, pry open the lid and behold – your own
freshly made drawing sticks! The neat thing of charcoal sticks as an
art medium is that it smudges easily, which can be used to create
impressive shadows and highlights – but can also easily muck up your
drawing. It is a good idea to use a fixative (like hairspray or an art
fixative) to protect your finished drawing, and to store your fragile
drawing sticks in a sturdy container like a mason jar so they don’t get
crushed or bent. And, last but not least: go forth & create!
BIBLIOGRAPHY
Dunn, Kevin M.
Caveman Chemistry, 2003. ISBN 1-58112-566-6
Neddo, Nick.
The Organic Artist, 2015. ISBN 978-1-59253-926-0
Verberg, Susan.
Of Charcoal and Ashes, 2015. Class Handout by Elska á Fjárfella.
https://www.academia.edu/27757474/Of_Charcoal_and_Ashes
Published in the Aethelmearc Gazette, October 24, 2016
https://aethelmearcgazette.com/2016/10/24/make-your-own-period-drawing-charcoal/


No comments:
Post a Comment