By Elska á Fjárfella of the Dominion of Myrkfaelinn.
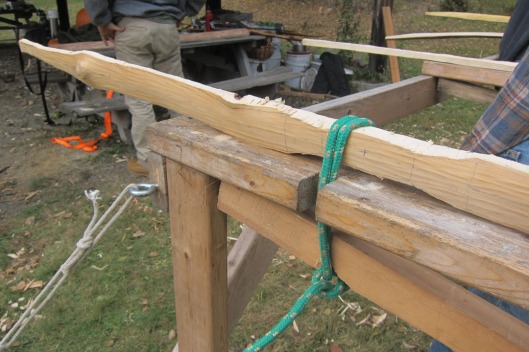
The third day started cloudy and quickly turned into drizzle. Even though we worked outdoors for most of the workshop, we fortunately had the luxury of a roofed pavilion, courtesy of Cornell University’s Arnot Teaching & Research Forest, as getting the bow staves wet or even damp should be avoided (I’d brought mine home to stay the night in the car, instead of all alone under the pavilion.). Moisture can swell the wood and make it harder or inconsistent to work with, as one of the students found out the hard way after she got some raindrops on one of the limbs. For our tillering convenience, the instructors had come up with an ingenious clamp system to secure the bow stave out of some rope and 2×4’s, which I duplicated at home the following week. I don’t think it will be used only for bow making!

Clamp
in use. Basically, it’s made up of a flat piece of 2×4 with a small cut
out and two pegs at the other side (behind bow). A rope loop is placed
through the cut out (helps wedge the stave tight to the wood pegs) and a
piece of 2×2 or 2×3 is pushed through the bottom of the rope loop. With
your hand push this lever down and secure the tension with in a piece
of scrap wood wedged in between. Do not hammer the scrap wood in; it
clamps better if pushed down by hand.
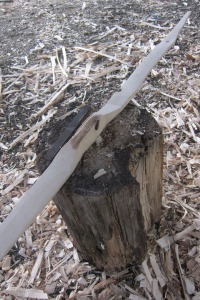
From this time on, the instructors were kept busy and would regularly swing by to check our bows, adding crosses to show where to stay away and squiggles where more wood needed to be removed. This step was quite a challenge as it is hard to see; the differences are minute and were mostly only ‘visible’ by touch. It sure helped that I have experience throwing pottery, as that’s all about seeing with your fingertips too! Interestingly, as our instructors would remind us now and then, we’re still not making a bow – we’re making a bow shaped sculpture! Not until the tillering stage, where the limbs are starting to get flexed, is the bow sculpture slowly transforming into a bow.
When the limbs of the bow finally start to have a little bend, as tested by gently bending, it finally is tillering time! The first tentative bending is done by putting the tip on something solid like a concrete floor, pushing away on the handle with one hand (and that elbow braced on your hip if needed) – nowhere else – and steadying the upper tip with the other: the wood remembers stress and the wrong pressure in the wrong place can permanently alter the flex of the limb! Now the rasp gets put away and the scraping knife is put to good use. We used knives similar to carving knives, fairly long but with a slight burr added to one edge for efficient scraping. And once again, all tool marks, now from the rasp, are carefully removed and the backs of the limbs are smoothed out. Then it is a matter of carefully removing layers of wood from the belly of the limbs until they started bending more and more, and more evenly. Also at this time we made a bowstring using the Flemish twist technique, and added nock points to the bow tips with a small saw (handmade by three hacksaw blades taped together). Carving or filing nock points works as well; just don’t carve into the back of the bow, only the sides and belly. The string would still be fairly long, so the bow bends shallowly and gently gets accustomed to becoming a bow.
With each removal & tillering check, we would string the bow and flex it shallowly about thirty times to exercise the stave so the wood becomes used to the flexing and compression needed for proper bow function. This exercise is also important as the changes just made with scraping take a while for the wood to remember and might not show up in the next tillering if proper exercise is omitted. We tillered both using a tillering stick, and with the help of our instructors and fellow students by putting a foot on the string and pulling the bow stave up while they would squat in front, look & critique. It was very instructive to see many types of trees and bow shapes and strengths and see how the limbs would bend differently from one to the other. The big thing to look for is where does it bend. Where does the limb curve, and where does it not? Ideally, the bow limbs curve most in the middle, with a bit less at the beginning near the handle, and near the end at the nock point. Where it bends too much (it’s thinnest there), wood needs to be removed

everywhere else, and where it is too stiff wood should be removed right there. Note that adding wood is not an option! And always check the edges of the bow to make sure they have the same thickness; that it does not slant from one side to the other, as this could introduce weakness and even twist.
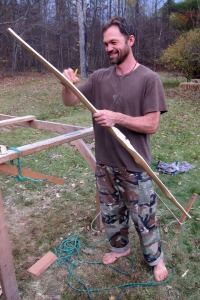
Fairly quickly my bow stave was bending well and looking good. Interestingly, the limb with the two knots curved beautifully right from the start. The knot free limb had a reflex which was messing with the tillering, it kept looking flat and stiff. Rather than overcompensate and weakening that spot, the instructor decided it was easier to just heat treat the reflex straight. Which probably looked a whole lot easier than it was. When both limbs had a good bend, and looked even (also check the negative space when strung between stave and string), the bow still was too heavy for me. It drew in the upper forties which I thought is a bit much. But as the tillering was correct, instead of messing with the belly of the bow and making it thinner, which could change the tillering, now the best option is to make it narrower and thus remove from the sides. There is a balance between how thick a bow limb should be and how wide, as a wider bow has more air resistance which needs compensation in strength while thinning makes it weaker. Thus with the lower poundage draw weights it is better to go narrow in width than lose too much thickness. As mentioned before, twice as thick is eight times as strong, so taking off a little belly could quickly be way too much…
Finally, the time had come to completely sand the bow (except for the back of course!), measure the right length for the bowstring (about 6 inches from the top if I remember correctly) and string it! Use a brace height of about a hand width (between string at rest and handle) and do not immediately pull to full length, go little bits at a time. Never leave a bow strung longer than it needs to be, it can develop string follow (stays slightly bend when unstrung) and loose strength. And never dry fire a bow, the energy that would otherwise travel with the arrow does not leave and can blow up the bow instead… And then the most satisfying of sounds: the thock of hitting the target with your first arrow!
The bow is still ‘young’ and needs ‘training’; exercise it regularly, shoot with it regularly, and not until it is a couple months old and you feel there is no more tweaking to be done is it time to finish. Oil, varnish or a stain – it does not really matter as long as you like it and it weatherproofs. Smooth the edges if you have not done so already. Carve pretty knock points. Add a leather wrapped handle. But most of all – take your bow and enjoy the great outdoors together!
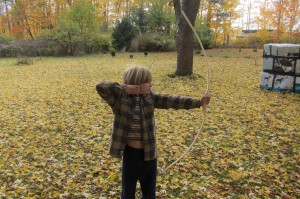
One last thing: be patient while crafting your bow. Take your time, put it away, come back to it; have a conversation. Read books, talk to bowyers: there are many different styles and techniques, and another way might work better for you. I found this course to be such fun, that I am already scouting our woods for logs to harvest, and with the experience I had enough information to make a quick bow with my son (and the band saw) from a stick harvested a couple days prior. We made it together and you should have seen him, he was so proud to shoot an arrow with a bow he’d made himself…

Simon (at right) with his self bow made from a 2” diameter green stick. Using a bandsaw for general shaping and tillering greatly shortened the time needed to make a bow, this one took about two hours, but also gave much more room for error as it is very quick and easy to take too much off. To save time (and limbs) a blend of modern and traditional techniques seems to work best: rough shaping with the bandsaw, and fine tuning with rasp and knife.
Want to read more?
Traditional Bowyers Bible’s Vol 1-4, Allely et al.; The Lyons Press, 2000
The Art of making Selfbows, Stim Wilcox
The Bow Builder’s Book, Horning ed.; Schiffer Publishing, Ltd., 2007
The Heritage of the Longbow, Pip Bickerstaffe; self published UK, 1999
For more information on the Bow Making Workshop. click here.
All photography and drawings by Susan Verberg, 2016.
From https://aethelmearcgazette.com/2016/11/15/from-split-log-to-bow-stave-the-last-day/


No comments:
Post a Comment