By Elska á Fjárfella of the Dominion of Myrkfaelinn.
When my hubbie decided he needed a better bow, he teamed up with Edward of Delftwood to make a longbow from a premade bowstave. It took him about six trips to Syracuse to get her done, and the bow he made is an absolutely gorgeous contrasting color triple layer laminate with a narrow “D” profile, made with plausible period materials and techniques. And while laminating is a period technique (one only has to think of the short, curved horse bow of the Mongol hordes) it’s not what came to my mind when he talked about making a longbow. I’d thought of stone age bows… Norse longbows… the incredible English longbows…
Reading up on the subject I quickly realized that what I like are self bows made from one piece of wood, especially ones with character (also called flaws). I could not find anyone to help learn about making self bows, but fortunately, we live in an area with an active primitive skills group of people (or Ithaca hippies, and do they look the part…). As part of the Primitive Pursuits outdoor classroom, which specializes in kid’s summer camps and after school programs but also has occasional adult weekend workshops, once a year a Bow Making Workshop is offered right here in town! And this year I decided to take the plunge…

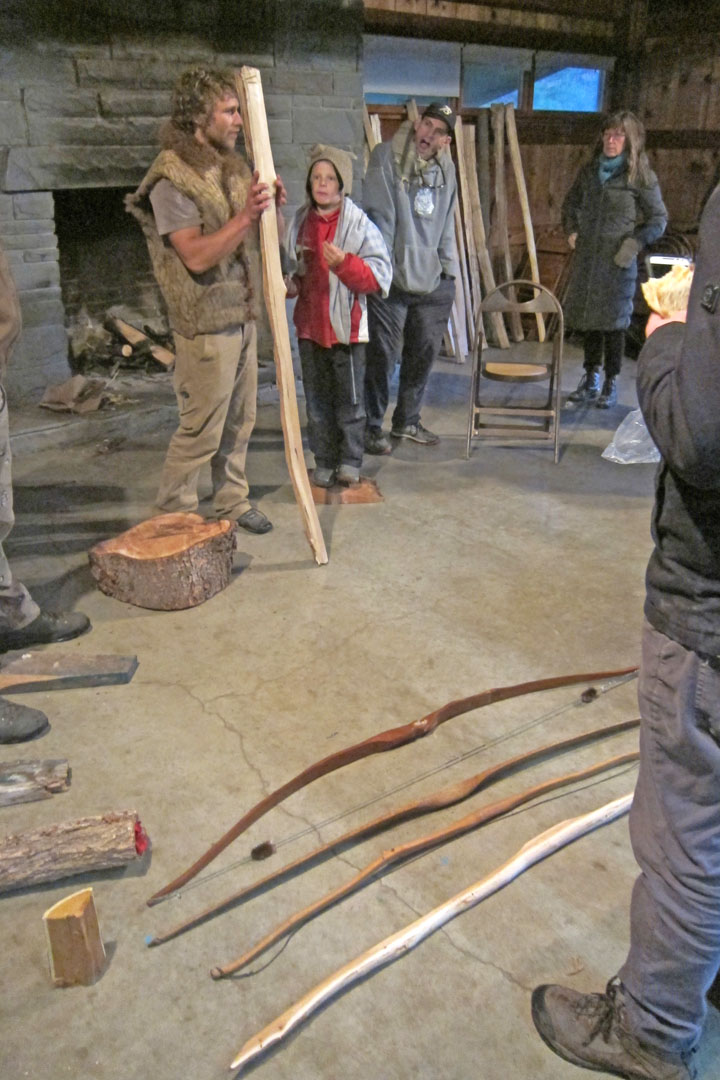
Our son Simon checking out the different self bows on display.
First things first. We started the workshop with a sing-along to honor the trees and say thanks. Not something I am used to, but nice in a graceful kind of way. Then our two instructors introduced themselves: Justin, barefooted and wearing an inside out sheepskin vest and Sean, also barefooted and pledged to eat and work from and with local materials only (he had a smoked squirrel for lunch). And while normally feeling a bit out of norm as homesteaders etc, here I was likely one of the more normal ones of the dozen and a half students! I felt right at home…
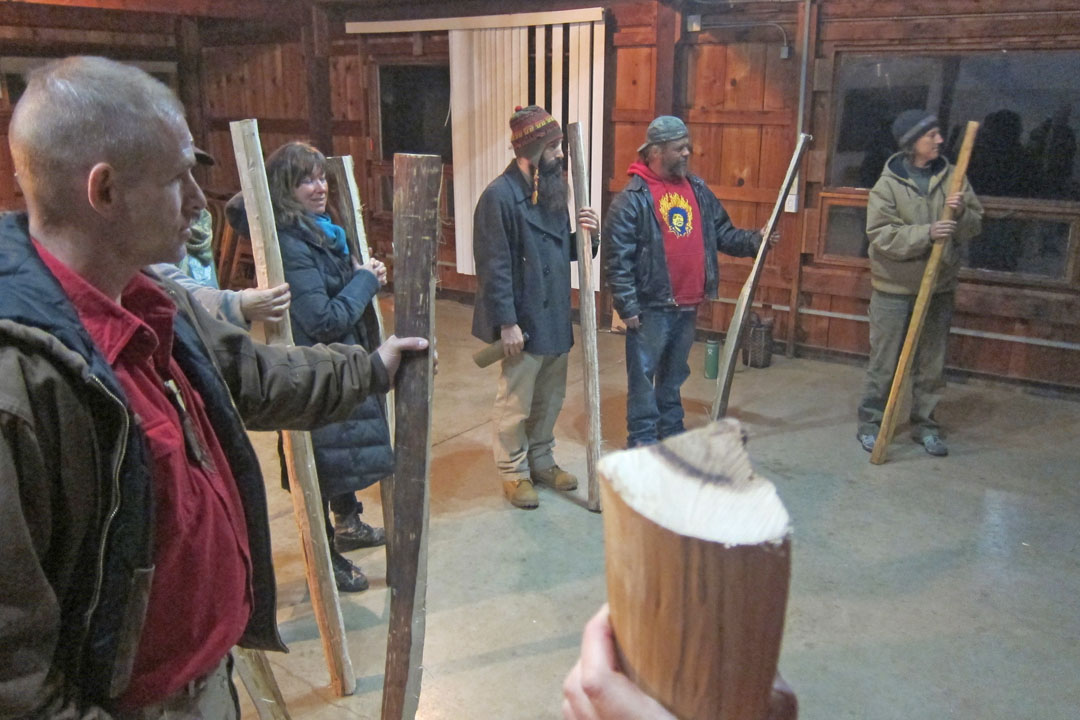
Talking about wood.
Next up is the quality of the wood. Of course, ideal would be a perfectly straight 6 to 7 foot, knot free trunk to be split into log staves. But who’s got one of those… Making a bow is much more forgiving that I expected and if reasonable care is taken in having a mostly straight, mostly knot free log, apparently it will be fine. What is to be avoided are twist and bends, especially for the beginner. A little twist could be worked around, and a reflex or deflex bend could be removed with heat, but these are more advanced techniques. Know your limitations and keep looking to find a log to go with your comfort level.
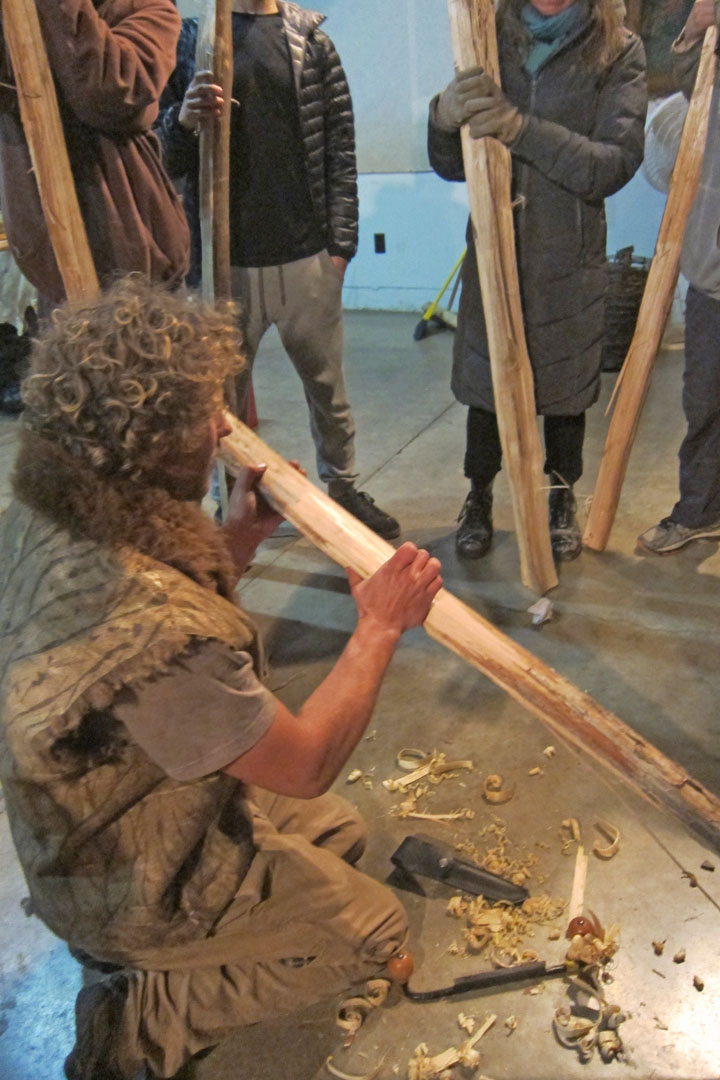
Demonstrating how to safely remove bark.
About half of the split logs the students could choose from had the bark already removed as they were harvested in the summer, which was very convenient. Removing the bark facilitates drying and also prevents bark beetles from taking up home and destroying the potential stave. Some people advise getting winter wood as the wood is driest that time of year, others advise getting summer wood as the bark peels off easily. The grain of the wood gives a bow its strength and flexibility, but only if the back is one continuous growth ring from top to bottom. With the types of trees mentioned, the wood right below the bark is the wood used for making a bow, and baring the growth ring is easy if the bark is loose and can be peeled right off. The exceptions are locust and osage orange, where the outer sapwood needs to be removed and only the inner core is used. If the bark is not loose, it can also be carefully peeled first with a drawknife and finished with a scraping knife. Using a drawknife is an acquired skill, so practice first on some scrap wood until you get a feel for what’s happening. Whichever way you choose, always make sure to peel away from knots so as not to violate the grain curving around imperfections. Grain does not tend to go straight, so keep a close eye on what’s going on and always, always follow the ‘yellow brick’ grain.
End of day one, each with our own split log. I choose a piece of shagbark hickory.
https://aethelmearcgazette.com/2016/11/13/from-split-log-to-bow-stave-day-one/
No comments:
Post a Comment